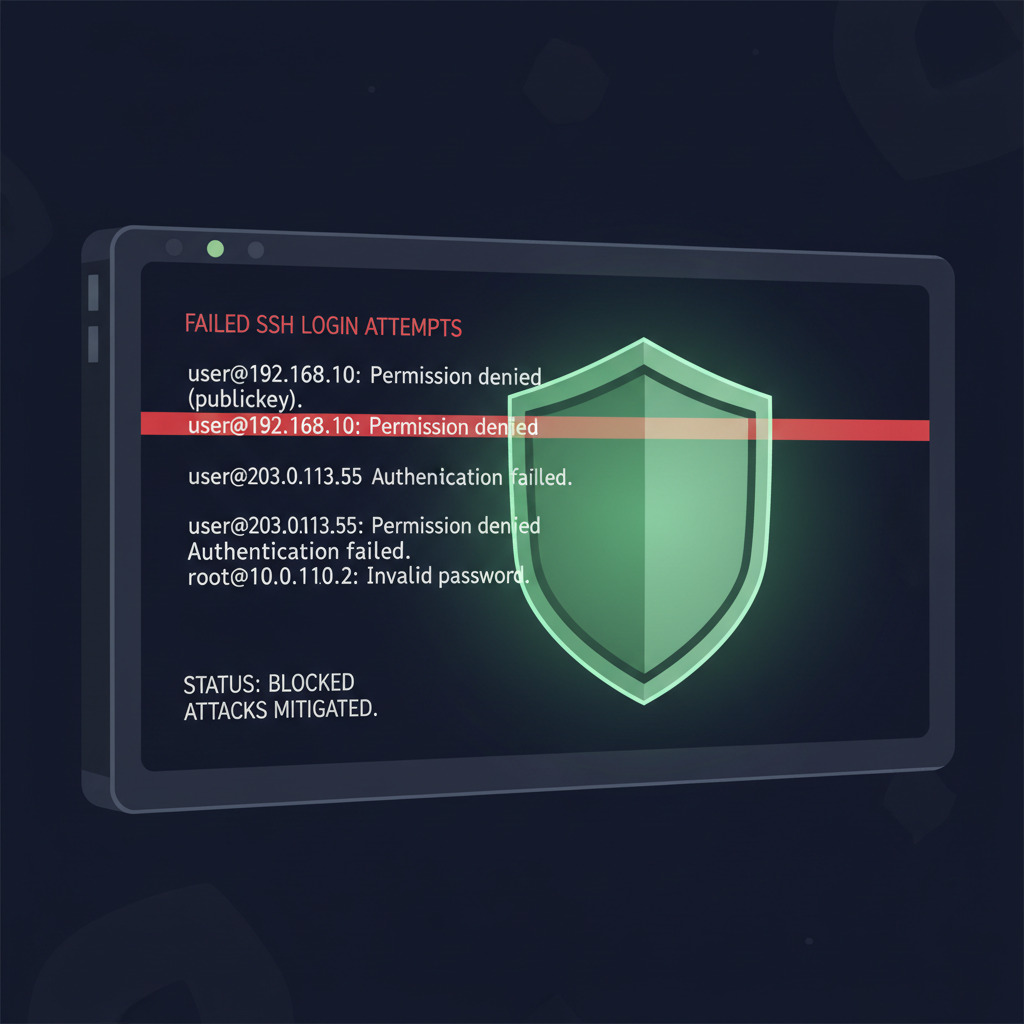
Every server connected to the internet is under constant attack. Within minutes of provisioning a new VPS, automated bots begin hammering SSH, probing web application login pages, and scanning for known vulnerabilities. Most sysadmins have seen their /var/log/auth.log fill up with thousands of failed login attempts from IP addresses scattered across the globe. Fail2Ban is the tool that makes this problem disappear.
Fail2Ban monitors your server's log files in real time, detects patterns of malicious behaviour (like repeated failed login attempts), and automatically bans offending IP addresses by updating your firewall rules. It has been the go-to intrusion prevention tool on Linux servers for over a decade, and for good reason: it works, it is lightweight, and it requires minimal configuration to start protecting your infrastructure.
This guide covers everything from installation to advanced custom jails, real log examples, email notifications, the fail2ban-client commands you will actually run in production, and honest comparisons with CrowdSec, Cloudflare WAF, and ModSecurity. If you manage servers that DeployHQ pushes code to, hardening them with Fail2Ban should be near the top of your checklist — right alongside SSH key authentication and a tight overall deployment security posture.
How Fail2Ban Works
Fail2Ban follows a straightforward pipeline: it reads log files, matches lines against filter patterns (regular expressions), and when a threshold is exceeded within a time window, it executes an action — typically adding a firewall rule to block the offending IP.
flowchart LR
    A[Log Files<br>/var/log/auth.log<br>/var/log/nginx/error.log] --> B[Filters<br>Regex pattern matching]
    B --> C[Jails<br>Threshold logic<br>maxretry / findtime]
    C --> D[Actions<br>iptables / nftables<br>firewalld / sendmail]
    D --> E[Ban Enforced<br>IP blocked for bantime]
The key components are:
- Filters — Regular expressions that identify failed authentication or abuse patterns in log lines. Fail2Ban ships with filters for SSH, Apache, Nginx, Postfix, Dovecot, and dozens of other services.
- Jails — Configuration blocks that tie a filter to a log file, a threshold (
maxretry), a time window (findtime), and a ban duration (bantime). Each jail operates independently. - Actions — What happens when a ban is triggered. The default action adds an iptables/nftables rule to drop all packets from the banned IP. You can also configure email notifications, Cloudflare API calls, or custom scripts.
Fail2Ban runs as a server process (fail2ban-server) managed by a client tool (fail2ban-client). The server watches logs via inotify (or polling as a fallback), so CPU usage stays negligible even on busy servers.
Where Fail2Ban Sits in the Defense-in-Depth Model
Security professionals talk about defense in depth: stacking layers so a failure at one layer does not compromise the whole system. Fail2Ban occupies a specific spot in that stack:
| Layer | Tool | What It Stops |
|---|---|---|
| L7 (application) | Cloudflare WAF, ModSecurity | SQL injection, XSS, malicious payloads |
| L7 (auth) | Application code, MFA | Credential stuffing, valid-looking auth abuse |
| L4 (transport) | Fail2Ban, CrowdSec | Repeated failed connections, brute-force IPs |
| L3 (network) | iptables/nftables, security groups | Blanket port and IP blocks |
Fail2Ban is reactive: it only blocks an IP after it has already attacked you maxretry times. That is a feature, not a bug — it lets you keep Port 22 open to the internet without manually maintaining allow-lists, while still locking out anything that misbehaves. It is not a substitute for SSH keys, MFA, or a real WAF.
Installation and Initial Setup
Ubuntu / Debian
sudo apt update
sudo apt install fail2ban -y
CentOS / RHEL / AlmaLinux
sudo dnf install epel-release -y
sudo dnf install fail2ban -y
Enable and Start the Service
sudo systemctl enable fail2ban
sudo systemctl start fail2ban
sudo systemctl status fail2ban
You should see active (running) in the output. If the service fails to start, check /var/log/fail2ban.log — the most common issue is a missing log file referenced in one of the default jails.
Verify It Is Running
sudo fail2ban-client status
Output:
Status
|- Number of jail:      1
`- Jail list:   sshd
On most distributions, the sshd jail is enabled by default. That means SSH brute-force protection is already active.
Core Configuration
Fail2Ban's configuration lives in /etc/fail2ban/. The critical rule: never edit the stock files directly. Updates will overwrite them. Instead, create override files:
/etc/fail2ban/jail.localoverrides/etc/fail2ban/jail.conf/etc/fail2ban/jail.d/*.conffor per-jail overrides/etc/fail2ban/filter.d/*.localfor filter customizations
Create your base configuration:
sudo cp /etc/fail2ban/jail.conf /etc/fail2ban/jail.local
Then edit /etc/fail2ban/jail.local. Here are the key global settings:
[DEFAULT]
# Ban for 1 hour (default is 10 minutes, which is too short)
bantime  = 1h

# Detection window: 10 minutes
findtime = 10m

# Allow 5 failures before banning
maxretry = 5

# Never ban your own IPs
ignoreip = 127.0.0.1/8 ::1 YOUR_OFFICE_IP/32

# Use systemd journal instead of log files (recommended for modern systems)
backend = systemd

# Email notifications (optional, see Email Notifications section)
# destemail = admin@yourdomain.com
# sender = fail2ban@yourdomain.com
# action = %(action_mwl)s
Important settings explained:
bantime— How long an IP stays banned. Use1hor24hfor repeat offenders. Setting this to-1means permanent ban (use with caution).findtime— The window within whichmaxretryfailures must occur. Ifmaxretry = 5andfindtime = 10m, the IP gets banned after 5 failures within 10 minutes.maxretry— Number of failures allowed before a ban. Lower values (3) are more aggressive; higher values (10) reduce false positives.ignoreip— Whitelist your own IPs here. Nothing is more frustrating than banning yourself from your own server — especially if it is a production deployment target.backend— Usesystemdon modern systems (Ubuntu 16.04+, CentOS 7+). This reads from the systemd journal directly instead of polling log files, which is more reliable and efficient. If you are new to writing systemd unit files for your own application, see our walkthrough on managing application services with systemd and Monit.
Incremental Bans: bantime.increment
The single most useful global option that most tutorials skip:
[DEFAULT]
bantime.increment = true
bantime.factor    = 2
bantime.maxtime   = 1w
bantime.rndtime   = 5m
With bantime.increment = true, the ban duration grows each time the same IP is caught:
- 1st offence → 1 hour (your
bantime) - 2nd offence → 2 hours (
bantime × factor) - 3rd offence → 4 hours
- 4th offence → 8 hours
- … capped at
bantime.maxtime(1 week here)
bantime.rndtime adds a small jitter so attackers cannot precisely time their re-attempts to coincide with unbans. Persistent scanners get progressively locked out without you ever touching the configuration again.
After making changes, reload:
sudo fail2ban-client reload
Protecting SSH
SSH is the primary attack vector for most servers. Here is a real-world example of what brute-force attempts look like in /var/log/auth.log:
Mar  7 14:23:01 web01 sshd[28341]: Failed password for root from 185.234.xx.xx port 43210 ssh2
Mar  7 14:23:03 web01 sshd[28341]: Failed password for root from 185.234.xx.xx port 43210 ssh2
Mar  7 14:23:05 web01 sshd[28341]: Failed password for root from 185.234.xx.xx port 43210 ssh2
Mar  7 14:23:06 web01 sshd[28345]: Failed password for invalid user admin from 185.234.xx.xx port 43212 ssh2
Mar  7 14:23:08 web01 sshd[28349]: Failed password for invalid user ubuntu from 185.234.xx.xx port 43215 ssh2
This is a bot cycling through common usernames at machine speed. Without Fail2Ban, it will try thousands of combinations per hour.
Configure the SSH jail in /etc/fail2ban/jail.local:
[sshd]
enabled  = true
port     = ssh
filter   = sshd
maxretry = 3
findtime = 5m
bantime  = 1h
# For aggressive repeat offenders:
# bantime.increment = true
# bantime.factor = 24
# bantime.maxtime = 1w
After enabling, check the jail status:
sudo fail2ban-client status sshd
Status for the jail: sshd
|- Filter
|  |- Currently failed: 2
|  |- Total failed:     847
|  `- File list:        /var/log/auth.log
`- Actions
   |- Currently banned: 3
   |- Total banned:     156
   `- Banned IP list:   185.234.xx.xx 91.132.xx.xx 45.142.xx.xx
To see the actual firewall rules Fail2Ban created:
sudo iptables -L f2b-sshd -n --line-numbers
Chain f2b-sshd (1 references)
num  target     prot opt source               destination
1    REJECT     all  --  185.234.xx.xx        0.0.0.0/0   reject-with icmp-port-unreachable
2    REJECT     all  --  91.132.xx.xx         0.0.0.0/0   reject-with icmp-port-unreachable
3    REJECT     all  --  45.142.xx.xx         0.0.0.0/0   reject-with icmp-port-unreachable
4    RETURN     all  --  0.0.0.0/0            0.0.0.0/0
On systems using nftables (Debian 11+, Ubuntu 22.04+), Fail2Ban uses the nftables backend instead. The effect is identical — banned IPs are dropped at the kernel level.
SSH hardening tip: If you use SSH key-based authentication with DeployHQ, disable password authentication entirely in /etc/ssh/sshd_config:
PasswordAuthentication no
PubkeyAuthentication yes
PermitRootLogin prohibit-password
This eliminates brute-force risk at the source. Fail2Ban then serves as a second layer, catching bots that waste connection resources even when passwords are disabled. If you find yourself fighting connection problems while configuring this, our guide to debugging SSH connections walks through the most common failure modes (host key mismatches, agent forwarding, MaxAuthTries triggering Fail2Ban itself, and more).
Protecting Web Servers
SSH is not the only service worth protecting. Web servers face login brute-forcing, scanner abuse, and bot crawling. If you run a reverse proxy in front of your applications, Fail2Ban hooks neatly into its logs.
Nginx Rate Limit Jail
[nginx-limit-req]
enabled  = true
port     = http,https
filter   = nginx-limit-req
logpath  = /var/log/nginx/error.log
maxretry = 5
findtime = 1m
bantime  = 30m
This catches clients that exceed Nginx's limit_req rate limiting and bans them entirely.
Apache Authentication Jail
[apache-auth]
enabled  = true
port     = http,https
filter   = apache-auth
logpath  = /var/log/apache2/error.log
maxretry = 5
findtime = 5m
bantime  = 1h
WordPress Login Protection
WordPress login pages are a favourite target. Create a custom filter at /etc/fail2ban/filter.d/wordpress-login.conf:
[Definition]
failregex = ^<HOST> -.* "POST /wp-login.php
            ^<HOST> -.* "POST /xmlrpc.php
ignoreregex =
And the jail in /etc/fail2ban/jail.local:
[wordpress-login]
enabled  = true
port     = http,https
filter   = wordpress-login
logpath  = /var/log/nginx/access.log
maxretry = 5
findtime = 5m
bantime  = 1h
Writing Custom Jails and Filters
The real power of Fail2Ban comes from writing custom filters for any log format. The process is:
- Identify the log line you want to match
- Write a regex using Fail2Ban's
<HOST>placeholder (matches IPv4 and IPv6) - Test with
fail2ban-regexbefore deploying - Create the jail configuration
Suppose you have a Node.js application that logs failed API authentication:
2026-03-07 14:30:12 WARN auth-failed ip=203.0.113.55 user=api_user reason="invalid token"
Create /etc/fail2ban/filter.d/myapp-auth.conf:
[Definition]
failregex = WARN auth-failed ip=<HOST>
ignoreregex =
Test it against your actual log file:
sudo fail2ban-regex /var/log/myapp/app.log /etc/fail2ban/filter.d/myapp-auth.conf
Output:
Results
=======

Failregex: 23 total
|-  #) [# of hits] regular expression
|   1) [23] WARN auth-failed ip=<HOST>
`-

Ignoreregex: 0 total

Date template hits:
|- [# of hits] date format
|  [23] {^LN-BEG}Year-Month-Day 24hour:Minute:Second
`-

Lines: 1847 lines, 0 ignored, 23 matched, 1824 missed
23 matches — the filter works. Now create the jail:
[myapp-auth]
enabled  = true
port     = 3000
filter   = myapp-auth
logpath  = /var/log/myapp/app.log
maxretry = 10
findtime = 5m
bantime  = 30m
The fail2ban-regex tool is indispensable. Always test before deploying — a bad regex can either miss attacks or ban legitimate users.
Dumping the Live Configuration
If something is not working as expected, dump the full resolved configuration to see exactly what Fail2Ban thinks it should be doing:
sudo fail2ban-client -d
This walks every jail, filter, and action and prints the effective settings (after jail.conf → jail.local → jail.d/*.conf merging). It is the fastest way to spot a typo in findtime or a logpath pointing at a file that no longer exists. Pair it with:
sudo fail2ban-client get sshd banip --with-time
sudo fail2ban-client get sshd actionproperties
…to inspect the exact state of any jail in real time without grepping through logs.
Email Notifications
Fail2Ban can send email alerts when bans occur. This is useful for monitoring without constantly checking logs.
Install a mail transfer agent:
# Debian/Ubuntu
sudo apt install sendmail -y

# or use postfix
sudo apt install postfix -y
Configure in /etc/fail2ban/jail.local:
[DEFAULT]
destemail = admin@yourdomain.com
sender    = fail2ban@yourdomain.com
mta       = sendmail

# action_mwl = ban + send email with whois info and log lines
action = %(action_mwl)s
The action types are:
action_— Ban only (default)action_mw— Ban + email with whois lookupaction_mwl— Ban + email with whois + relevant log lines (most informative, slightly more resource-intensive)
For high-traffic servers where bans happen frequently, stick with action_ (ban only) and use monitoring tools instead. Email notifications work best for low-traffic servers where each ban warrants human attention.
Fail2Ban vs CrowdSec
CrowdSec is the most common alternative to Fail2Ban, and the two are frequently compared. Here is an honest breakdown:
| Aspect | Fail2Ban | CrowdSec |
|---|---|---|
| Architecture | Single-server, log-based | Agent + API, crowd-sourced intelligence |
| Threat intelligence | Local only — learns from your logs | Community blocklists shared across all users |
| Language | Python | Go |
| Resource usage | Very low (~10-30MB RAM) | Higher (~50-100MB RAM), separate database |
| Configuration | INI files, regex filters | YAML scenarios, more structured |
| Learning curve | Lower — edit jail.local, done | Steeper — concepts of bouncers, parsers, scenarios |
| Log parsing | Regex-based (simple, flexible) | Grok patterns (more powerful, more complex) |
| Dashboard | CLI only (fail2ban-client) |
Web console via CrowdSec Hub |
| Multi-server | No built-in coordination | Native multi-server with shared decisions |
| Maturity | 20+ years, battle-tested | Newer (2020), rapidly evolving |
When to choose Fail2Ban:
- Single server or small fleet where shared threat intelligence is unnecessary
- You want minimal dependencies and resource usage
- You need custom filters for niche applications and prefer regex simplicity
- You value stability over features — Fail2Ban rarely needs updates
When to choose CrowdSec:
- You manage many servers and want coordinated IP blocking across your fleet
- You want pre-built community blocklists (e.g., block known Tor exit nodes, botnets)
- You prefer a modern toolchain with a web dashboard
- You need AppSec-level rules (HTTP request analysis, not just log pattern matching)
The pragmatic take: For a typical deployment server that receives code pushes from DeployHQ and serves a web application, Fail2Ban covers 95% of what you need. CrowdSec's crowd-sourced intelligence is genuinely useful at scale, but the added complexity is hard to justify for a handful of servers. Many sysadmins run both — Fail2Ban for custom log monitoring, CrowdSec for community blocklists.
Fail2Ban vs Cloudflare WAF
Fail2Ban and Cloudflare WAF operate at different layers and solve different problems. They are complementary, not competing.
| Aspect | Fail2Ban | Cloudflare WAF |
|---|---|---|
| Layer | Server-level (L3/L4) | Edge/CDN (L7) |
| What it blocks | IP addresses via firewall rules | HTTP requests via WAF rules |
| DDoS protection | Limited — traffic still hits your server | Strong — traffic filtered before reaching your origin |
| Application awareness | None — pattern matches log lines | Deep — inspects HTTP headers, bodies, cookies |
| Cost | Free and open source | Free tier available, advanced rules require paid plans |
| Setup | On your server, full control | DNS-based, requires routing traffic through Cloudflare |
| Custom rules | Unlimited, regex-based | Limited on free tier, JavaScript-based on paid |
Use both when possible. Cloudflare blocks application-layer attacks (SQL injection, XSS, bot scrapers) before they reach your server. Fail2Ban blocks IP-level abuse (SSH brute-force, SMTP abuse) that Cloudflare never sees because it does not proxy those protocols.
If an attacker bypasses Cloudflare and hits your origin directly, Fail2Ban is your last line of defence.
Fail2Ban vs ModSecurity
ModSecurity is a web application firewall (WAF) that runs as an Apache or Nginx module. It inspects HTTP requests in real time against a rule set (typically OWASP Core Rule Set).
Fail2Ban and ModSecurity are complementary:
- ModSecurity detects and blocks malicious HTTP requests (SQL injection, path traversal, XSS) on a per-request basis
- Fail2Ban can read ModSecurity's logs and ban the source IP entirely after repeated offences
In fact, Fail2Ban ships with a modsec filter. Enable it:
[apache-modsecurity]
enabled  = true
port     = http,https
filter   = apache-modsecurity
logpath  = /var/log/apache2/modsec_audit.log
maxretry = 3
findtime = 5m
bantime  = 1h
This combination means a single SQL injection attempt gets blocked by ModSecurity, but a scanner that tries 10 different attack vectors gets IP-banned by Fail2Ban.
Securing Deployment Servers
If you use DeployHQ to automate deployments via SSH, your deployment target servers need particular attention. The SSH port is open and accepting connections — which is exactly what brute-force bots are looking for. The same is true if you self-host services like Vaultwarden or Nextcloud on a public VPS — every open port is a target.
Here is a hardening checklist for servers that receive automated deployments:
- Use SSH keys exclusively — DeployHQ connects via SSH keys, so disable password authentication entirely
- Whitelist DeployHQ's IP range in Fail2Ban's
ignoreipso deployment connections are never accidentally banned. If your servers sit on a private network, the DeployHQ Agent avoids opening SSH to the internet at all - Set aggressive SSH thresholds — with passwords disabled and DeployHQ whitelisted, you can lower
maxretryto 2 or 3 without risk - Change the SSH port (optional) — moving from port 22 to a high port (e.g., 2222) eliminates 99% of automated scanning. Configure the custom port in your DeployHQ project settings
- Enable
bantime.increment— repeat offenders get progressively longer bans - Monitor Fail2Ban logs — include
/var/log/fail2ban.login your centralized logging if you manage multiple servers for client agencies
# Hardened SSH jail for deployment servers
[sshd]
enabled           = true
port              = 2222
maxretry          = 2
findtime          = 5m
bantime           = 24h
bantime.increment = true
bantime.factor    = 48
bantime.maxtime   = 4w
ignoreip          = 127.0.0.1/8 ::1 DEPLOYHQ_IP_RANGE YOUR_OFFICE_IP
With this configuration, a bot that hits the SSH port twice in 5 minutes gets banned for 24 hours. If it comes back, the ban doubles to 48 hours, then 96 hours, up to a maximum of 4 weeks.
Monitoring and Troubleshooting
Checking Jail Status
# Overview of all jails
sudo fail2ban-client status

# Detailed status for a specific jail
sudo fail2ban-client status sshd
Manually Banning and Unbanning IPs
You will inevitably ban yourself or a colleague. Unban with:
sudo fail2ban-client set sshd unbanip 203.0.113.55
You can also ban an IP manually — useful if you spot abuse in another log Fail2Ban is not watching:
sudo fail2ban-client set sshd banip 203.0.113.55
To check whether a specific IP is currently banned and how much time is left on the ban:
sudo fail2ban-client get sshd banip --with-time
The --with-time flag is the version most people actually want — it prints each banned IP alongside its remaining ban duration, which is far more useful than just a bare list of addresses.
Checking the Fail2Ban Log
sudo tail -f /var/log/fail2ban.log
Typical ban entry:
2026-03-07 15:42:18,304 fail2ban.actions [1234]: NOTICE [sshd] Ban 185.234.xx.xx
Typical unban entry:
2026-03-07 16:42:18,512 fail2ban.actions [1234]: NOTICE [sshd] Unban 185.234.xx.xx
Common Issues
Fail2Ban is not banning anything:
- Check that the log file path in your jail matches the actual log location
- Verify the filter regex matches the log format:
sudo fail2ban-regex /path/to/log /etc/fail2ban/filter.d/filtername.conf - Make sure the
backendsetting is correct (systemdfor journal,autofor file-based) - Check that Fail2Ban is actually running:
sudo systemctl status fail2ban
Fail2Ban keeps banning legitimate users:
- Add their IPs to
ignoreipinjail.local - Increase
maxretryfor that jail - Check if the filter regex is too broad (matching successful logins, not just failures)
Fail2Ban uses too much memory:
- If you have very large log files, set
maxlinesin the filter to limit how far back Fail2Ban reads - Use
backend = systemdinstead of file-based polling where possible - Reduce
findtime— a shorter window means less state to track
Bans are not surviving Fail2Ban restarts:
- Enable the database:
dbfile = /var/lib/fail2ban/fail2ban.sqlite3infail2ban.conf - This is enabled by default on modern versions but may be missing on older installs
Fail2Ban Inside Docker (and on Docker Hosts)
Fail2Ban modifies iptables rules on the host, but Docker also manipulates iptables for container networking. This causes a subtle but very common problem: Fail2Ban inserts its REJECT rules into the INPUT chain, but Docker's published-port rules live in the FORWARD chain via the DOCKER-USER chain — so traffic to a containerized service skips Fail2Ban's bans entirely.
The fix is to insert Fail2Ban's rules into Docker's user chain instead:
[DEFAULT]
chain = DOCKER-USER
DOCKER-USER is processed before Docker's own forwarding rules, which means a Fail2Ban ban will block traffic to containers, not just to host-bound services. This applies whether you run a single container per host or a fleet of services behind a reverse proxy. If you also run Fail2Ban inside a container, mount the host's log directories read-only and give the container NET_ADMIN capability so it can manipulate the host's firewall — running it without host-level firewall access defeats the point.
Quick Reference
| Task | Command |
|---|---|
| Check all jail status | sudo fail2ban-client status |
| Check specific jail | sudo fail2ban-client status sshd |
| Ban an IP manually | sudo fail2ban-client set sshd banip 1.2.3.4 |
| Unban an IP | sudo fail2ban-client set sshd unbanip 1.2.3.4 |
| List banned IPs with remaining time | sudo fail2ban-client get sshd banip --with-time |
| Reload configuration | sudo fail2ban-client reload |
| Reload a specific jail | sudo fail2ban-client reload sshd |
| Dump full effective configuration | sudo fail2ban-client -d |
| Test a filter regex | sudo fail2ban-regex /var/log/auth.log /etc/fail2ban/filter.d/sshd.conf |
| View current iptables bans | sudo iptables -L f2b-sshd -n |
| View current nftables bans | sudo nft list set inet f2b-table addr-set-sshd |
| Check Fail2Ban log | sudo tail -f /var/log/fail2ban.log |
Hardening Your Deployment Pipeline
Fail2Ban protects the server. But server security is only one piece of the puzzle — the deployment process itself needs to be secure. If an attacker compromises your CI/CD pipeline or deployment credentials, Fail2Ban cannot help.
Pair Fail2Ban with deployment best practices:
- Use SSH key authentication for all automated deployments. DeployHQ supports this natively and generates unique key pairs per project.
- Restrict deployment users — the SSH user that DeployHQ connects as should have minimal permissions (write to the webroot, restart services, nothing more).
- Audit deployment logs — know what was deployed, when, and by whom. DeployHQ keeps a full history of every deployment.
- Keep your servers patched — Fail2Ban blocks brute-force attacks, but it cannot protect against exploits in unpatched software.
If you are not already automating your deployments, DeployHQ connects to your Git repository, builds your project, and pushes it to your servers over SSH — the same SSH connection that Fail2Ban protects.
For questions about securing your deployment servers or configuring DeployHQ for SSH-based deployments, reach out to support@deployhq.com or find us on Twitter/X.