Deploying web applications to a Virtual Private Server gives you full control over your hosting environment, but setting up a reliable, repeatable deployment pipeline can be daunting. This guide walks you through every step: hardening your VPS, configuring SSH key authentication, setting up your application, and connecting it all to DeployHQ for automated Git-based deployments.
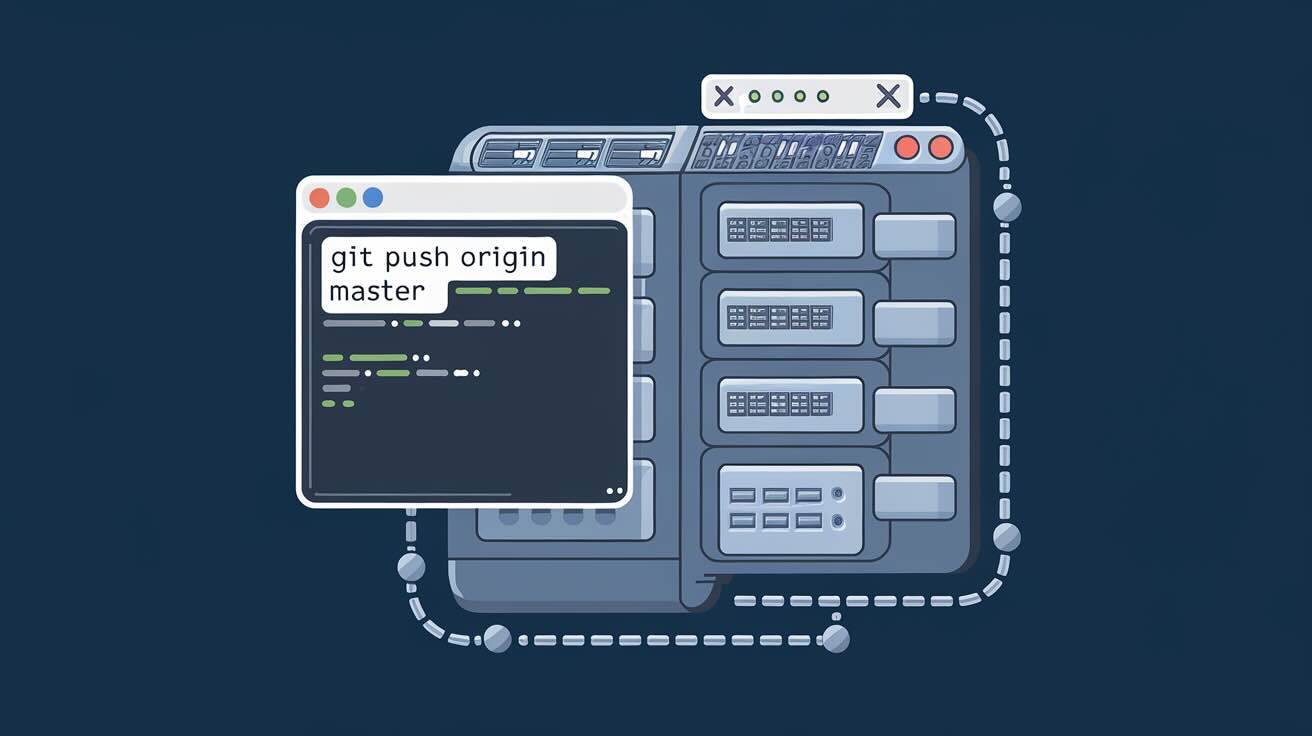
By the end, you will have a production-ready workflow where every git push triggers an automatic deployment to your server — with zero manual file transfers.
Why Git-Based Deployment Beats Manual Uploads
If you are still uploading files over FTP or copying them via scp, you are introducing risk with every release. Git-based deployment solves this by treating your repository as the single source of truth:
- Atomic changes — only modified files are transferred, reducing deployment time and bandwidth
- Built-in rollback — every commit is a snapshot you can revert to in seconds using DeployHQ's rollback feature
- Audit trail — deployment logs show exactly what changed, when, and who triggered it
- Consistency — the same process runs every time, eliminating
works on my machine
surprises - Collaboration — multiple developers push to the same branch; the deployment pipeline handles the rest
If you are new to VPS hosting, read VPS 101: Understanding Virtual Private Servers before continuing.
What You Will Need
Before starting, make sure you have:
- A VPS with Ubuntu 22.04 or later (Debian, Rocky Linux, and other distributions work with minor adjustments). Providers like DigitalOcean, Linode, Hetzner, or Vultr all work.
- Root or sudo access via SSH
- A Git repository hosted on GitHub, GitLab, Bitbucket, or a self-hosted Git server (you can even deploy GitLab on your own VPS)
- A DeployHQ account — sign up for a free trial if you do not have one yet
Step 1: Secure Your VPS
A freshly provisioned VPS is exposed to the public internet. Before deploying anything, lock it down.
Create a Deploy User
Never deploy as root. Create a dedicated user with limited privileges:
# Connect to your VPS as root
ssh root@your-server-ip

# Create a deploy user
adduser deploy

# Grant sudo access (for initial setup only)
usermod -aG sudo deploy
Configure the Firewall
Ubuntu ships with ufw (Uncomplicated Firewall). Enable it and allow only the traffic you need:
# Allow SSH connections
ufw allow OpenSSH

# Allow HTTP and HTTPS traffic
ufw allow 80/tcp
ufw allow 443/tcp

# Enable the firewall
ufw enable

# Verify the rules
ufw status verbose
Harden SSH Access
Edit the SSH daemon configuration to disable password authentication and root login:
sudo nano /etc/ssh/sshd_config
Find and change (or add) these directives:
PermitRootLogin no
PasswordAuthentication no
PubkeyAuthentication yes
MaxAuthTries 3
Restart the SSH service:
sudo systemctl restart sshd
Warning: Before disabling password authentication, make sure your SSH key is already installed on the server (covered in the next step). Otherwise you will lock yourself out.
Step 2: Set Up SSH Key Authentication
SSH keys let DeployHQ (and you) connect to your server without a password. If you need a refresher on generating keys, see 5 Ways to Create SSH Keys from the Command Line.
Generate a Key Pair on Your Local Machine
# Generate an Ed25519 key (recommended)
ssh-keygen -t ed25519 -C "deploy@your-project" -f ~/.ssh/deploy_key

# Or generate an RSA key if your server requires it
ssh-keygen -t rsa -b 4096 -C "deploy@your-project" -f ~/.ssh/deploy_key
This creates two files:
~/.ssh/deploy_key— your private key (never share this)~/.ssh/deploy_key.pub— your public key (installed on the server)
Install the Public Key on Your VPS
# Copy the public key to your deploy user
ssh-copy-id -i ~/.ssh/deploy_key.pub deploy@your-server-ip
If ssh-copy-id is not available, do it manually:
# On your local machine, display the public key
cat ~/.ssh/deploy_key.pub

# On the VPS, as the deploy user
mkdir -p ~/.ssh
nano ~/.ssh/authorized_keys
# Paste the public key content, save and exit

# Set correct permissions
chmod 700 ~/.ssh
chmod 600 ~/.ssh/authorized_keys
Test the Connection
ssh -i ~/.ssh/deploy_key deploy@your-server-ip
You should connect without being prompted for a password.
Step 3: Prepare the Deployment Directory
Back on your VPS (logged in as deploy or via sudo), create and configure the web root:
# Create the project directory
sudo mkdir -p /var/www/myproject

# Set ownership to the deploy user
sudo chown -R deploy:deploy /var/www/myproject

# Set directory permissions
sudo chmod -R 755 /var/www/myproject
If your application needs a writable storage or logs directory:
mkdir -p /var/www/myproject/storage/logs
chmod -R 775 /var/www/myproject/storage
Install Runtime Dependencies
Depending on your stack, install what your application needs. For a Node.js application:
# Install Node.js via NodeSource
curl -fsSL https://deb.nodesource.com/setup_20.x | sudo -E bash -
sudo apt-get install -y nodejs

# Verify installation
node --version
npm --version
For PHP applications:
sudo apt-get install -y php8.2-fpm php8.2-cli php8.2-mbstring php8.2-xml php8.2-curl
Step 4: Connect Your Repository to DeployHQ
This is where DeployHQ replaces all the manual deployment scripts you would otherwise need to write and maintain. The SSH deployment workflow takes over from here — key auth, diff uploads, post-deploy commands, and rollback all run automatically.
Create a New Project
- Log in to your DeployHQ dashboard
- Click New Project
- Give it a name (e.g.
My VPS App
) - Select your repository host — GitHub, GitLab, Bitbucket, or Codebase
- Authorise DeployHQ to access your repositories and select the one you want to deploy
Add a Server
- Inside your project, go to Servers and Groups
- Click New Server
- Choose SSH/SFTP as the protocol
- Fill in the connection details:
- Hostname: your VPS IP address or domain name
- Port:
22(or your custom SSH port) - Username:
deploy - Authentication: choose SSH Key and either paste the private key content or use DeployHQ's auto-generated key (copy its public key to your server's
authorized_keys) - Deployment Path:
/var/www/myproject
- Click Test Connection to verify DeployHQ can reach your server
- Set the Branch to deploy from (typically
mainorproduction) - Save the server configuration
Configure Build Commands
If your project requires a build step (compiling assets, installing dependencies), add build commands under the Build Pipeline. DeployHQ runs these commands on its own build servers before transferring files to your VPS. For details on configuring pipelines, read Build Pipelines in DeployHQ.
Common build commands:
- Node.js:
npm ci && npm run build - PHP (Composer):
composer install --no-dev --optimize-autoloader - Python:
pip install -r requirements.txt - Static sites:
hugo buildorjekyll build
Add SSH Commands (Post-Deployment)
After files land on your server, you often need to restart services or run migrations. Configure these under SSH Commands in the server settings:
- After deployment:
cd /var/www/myproject && npm install --production(if you transferpackage.jsoninstead of building remotely)sudo systemctl restart myproject(restart your application — see the systemd section below)php artisan migrate --force(for Laravel projects)
Step 5: Set Up a systemd Service (Node.js Example)
If your application is a long-running process (a Node.js server, Python WSGI app, etc.), create a systemd service so it starts automatically and restarts on failure.
Create the service file:
sudo nano /etc/systemd/system/myproject.service
Paste the following (adjust paths and commands for your stack):
[Unit]
Description=My Project Application
After=network.target

[Service]
Type=simple
User=deploy
Group=deploy
WorkingDirectory=/var/www/myproject
ExecStart=/usr/bin/node /var/www/myproject/dist/server.js
Restart=on-failure
RestartSec=5
StandardOutput=journal
StandardError=journal
Environment=NODE_ENV=production
Environment=PORT=3000

[Install]
WantedBy=multi-user.target
Enable and start the service:
# Reload systemd to pick up the new service file
sudo systemctl daemon-reload

# Enable the service to start on boot
sudo systemctl enable myproject

# Start the service
sudo systemctl start myproject

# Check its status
sudo systemctl status myproject
Now the SSH command sudo systemctl restart myproject in your DeployHQ post-deployment hook will gracefully restart the application after each deploy.
Tip: For the
deployuser to runsystemctl restartwithout a password prompt, add a targeted sudoers rule:sudo visudo -f /etc/sudoers.d/deployAdd:
deploy ALL=(ALL) NOPASSWD: /usr/bin/systemctl restart myproject
Step 6: Enable Automatic Deployments via Webhooks
By default, you trigger deployments manually from the DeployHQ dashboard. To deploy automatically on every push:
- In your DeployHQ project, go to your server settings
- Enable Automatic Deployments
- Copy the webhook URL that DeployHQ provides
- Add this webhook to your repository:
- GitHub: Settings > Webhooks > Add webhook, paste the URL, select
Just the push event
- GitLab: Settings > Webhooks > Add webhook, paste the URL, check
Push events
- Bitbucket: Repository settings > Webhooks > Add webhook
- GitHub: Settings > Webhooks > Add webhook, paste the URL, select
For a deeper walkthrough, see How to Set Up Git Pull Deployments with DeployHQ.
Now every push to your configured branch triggers a deployment automatically. The complete flow looks like this:
flowchart TD
    A[Developer pushes to main branch] --> B[Repository sends webhook to DeployHQ]
    B --> C[DeployHQ pulls latest code]
    C --> D{Build commands configured?}
    D -->|Yes| E[Run build pipeline on DeployHQ servers]
    D -->|No| F[Skip build step]
    E --> G[Transfer changed files via SSH/SFTP to VPS]
    F --> G
    G --> H{SSH commands configured?}
    H -->|Yes| I[Run post-deployment commands on VPS]
    H -->|No| J[Deployment complete]
    I --> J
    J --> K[DeployHQ sends notification - email / Slack / webhook]
Step 7: Configure Zero-Downtime Deployments
Standard deployments replace files in place, which can cause brief errors if a user hits your site mid-transfer. Zero-downtime deployments solve this by using an atomic symlink swap.
How It Works
DeployHQ maintains a releases/ directory with timestamped folders. Each deployment goes into a new release folder. Once all files are transferred and build steps complete, DeployHQ atomically switches a current symlink to point at the new release. The old release stays around for instant rollback.
The directory structure on your server looks like this:
/var/www/myproject/
  releases/
    20260220120000/    <-- previous release
    20260220143000/    <-- current release (symlinked)
  current -> releases/20260220143000
  shared/
    storage/
    .env
Enable It in DeployHQ
- In your server settings, check Enable Zero Downtime Deployments
- Set the number of releases to keep (e.g. 5)
- Configure Shared Files and Shared Folders — these are symlinked into every release so persistent data (uploads,
.envfiles, logs) is not lost between deployments
Update Your Web Server and systemd
Point your web server and systemd service at the current symlink:
Nginx (/etc/nginx/sites-available/myproject):
server {
    listen 80;
    server_name yourdomain.com;
    root /var/www/myproject/current/public;

    location / {
        try_files $uri $uri/ /index.php?$query_string;
    }
}
systemd (update WorkingDirectory and ExecStart):
WorkingDirectory=/var/www/myproject/current
ExecStart=/usr/bin/node /var/www/myproject/current/dist/server.js
After updating, run sudo systemctl daemon-reload && sudo systemctl restart myproject.
For a deeper explanation of the strategy, read Zero-Downtime Deployments: Keeping Your Application Running Smoothly.
Step 8: Set Up Multiple Environments
Production deployments should never be your only environment. A typical setup includes development, staging, and production servers — each deploying from a different branch.
In DeployHQ, add multiple servers under the same project:
| Environment | Branch | Server Path | Purpose |
|---|---|---|---|
| Development | develop |
/var/www/myproject-dev |
Rapid iteration and testing |
| Staging | staging |
/var/www/myproject-staging |
Pre-production QA |
| Production | main |
/var/www/myproject |
Live site |
Each server can have its own build commands, SSH commands, and notification settings. For a full walkthrough, see Managing Multiple Environments with DeployHQ.
Best Practices for VPS Deployments
Keep Secrets Out of Your Repository
Store environment variables, API keys, and database credentials in a .env file on the server — never commit them. When using zero-downtime deployments, add .env as a shared file so it persists across releases.
Use a Deployment Checklist
Before your first production deployment, run through every step systematically. The Ultimate Deployment Checklist covers database backups, dependency audits, smoke tests, and rollback procedures.
Monitor Your Application
Set up basic monitoring so you know when something breaks:
# Install and enable fail2ban to block brute-force SSH attempts
sudo apt-get install -y fail2ban
sudo systemctl enable fail2ban
sudo systemctl start fail2ban
Consider adding:
- Application monitoring — tools like PM2 (Node.js), Supervisor (Python), or systemd watchdog
- Uptime monitoring — services like UptimeRobot or Better Stack
- Log aggregation — centralised logging with journald, Loki, or a managed service
Automate SSL Certificates
Use Certbot to get free HTTPS certificates from Let's Encrypt:
sudo apt-get install -y certbot python3-certbot-nginx
sudo certbot --nginx -d yourdomain.com
Certbot configures automatic renewal. Verify with:
sudo certbot renew --dry-run
Keep Your Server Updated
Schedule unattended security updates:
sudo apt-get install -y unattended-upgrades
sudo dpkg-reconfigure -plow unattended-upgrades
Troubleshooting Common Issues
Permission denied (publickey)
When DeployHQ Connects
This means the SSH key is not correctly installed or the permissions are wrong.
# Check permissions on the deploy user's home directory
ls -la /home/deploy/
# Should be drwxr-xr-x (755) owned by deploy:deploy

ls -la /home/deploy/.ssh/
# Should be drwx------ (700) owned by deploy:deploy

ls -la /home/deploy/.ssh/authorized_keys
# Should be -rw------- (600) owned by deploy:deploy

# Fix if needed
chown -R deploy:deploy /home/deploy/.ssh
chmod 700 /home/deploy/.ssh
chmod 600 /home/deploy/.ssh/authorized_keys
Also verify that the key in DeployHQ matches the public key in authorized_keys on the server.
Deployment Succeeds but Site Shows Old Content
- Check your web server root — make sure Nginx or Apache points to the correct path (or the
currentsymlink if using zero-downtime) - Clear application caches — add a cache-clear command to your post-deployment SSH commands
- Browser cache — hard-refresh with
Ctrl+Shift+Ror test in an incognito window
Post-Deployment SSH Commands Fail
- Verify the
deployuser can run the commands manually via SSH - Check that sudo rules are configured for commands that need elevated privileges
- Review the deployment log in DeployHQ for the exact error output
Application Crashes After Deployment
# Check systemd service logs
sudo journalctl -u myproject -n 50 --no-pager

# Check if the process is running
sudo systemctl status myproject

# Check for port conflicts
sudo lsof -i :3000
Firewall Blocks DeployHQ Connection
If your VPS has strict firewall rules, you may need to allow DeployHQ's IP ranges. Check the DeployHQ documentation for current server IPs, or ensure port 22 (or your custom SSH port) is open.
Frequently Asked Questions
Do I Need Git Installed on My VPS?
Not necessarily. DeployHQ transfers files over SSH/SFTP — it does not run git pull on your server. The Git operations happen on DeployHQ's infrastructure. However, if you want to use Git pull deployments as an alternative method, then yes, Git must be installed on the server.
Can I Deploy to Multiple VPS Servers at Once?
Yes. Add multiple servers under the same DeployHQ project. You can group them into a Server Group so a single trigger deploys to all servers simultaneously — useful for load-balanced setups.
What Happens If a Deployment Fails Midway?
DeployHQ tracks which files were transferred. If a deployment fails, you can retry or roll back to the previous successful deployment. With zero-downtime mode, the symlink only switches after a fully successful deployment, so a partial failure never affects the live site.
Can I Deploy WordPress to a VPS with DeployHQ?
Absolutely. WordPress themes and plugins work well with Git-based deployment. See our dedicated guide: Deploying a WordPress Application on a VPS.
What about other CMS platforms on a VPS?
The same Git-based pipeline works for any PHP CMS. For a step-by-step walkthrough on a Vultr server, see how to deploy ProcessWire on a VPS with automated Git deployments.
How Does This Compare to Shared Hosting?
A VPS gives you root access, custom server configuration, and better performance, but requires more setup. Shared hosting is simpler but limits what you can do. For a detailed comparison, read Shared Hosting vs VPS: A Comprehensive Guide.
Is DeployHQ Free?
DeployHQ offers a free trial so you can test the full feature set. After that, plans start at an affordable tier with options for teams and enterprises.
Summary
You now have a complete, production-grade Git-based deployment pipeline to your VPS:
- Secured your server with a dedicated deploy user, firewall rules, and SSH key authentication
- Prepared the deployment target with correct permissions and runtime dependencies
- Connected DeployHQ to your repository and VPS via the web dashboard
- Configured build commands and post-deployment SSH commands
- Created a systemd service for automatic process management (for more advanced service management techniques, see our guide to systemd and Monit for application services)
- Enabled webhooks for fully automated deployments on every push
- Set up zero-downtime deployments to eliminate user-facing interruptions
- Added multiple environments for safe staging and testing workflows
No more manual uploads. No more deployment anxiety. Every push follows the same tested pipeline.
Once your VPS deployment pipeline is in place, you can extend it to deploy additional services — for example, installing Keycloak on your VPS to add single sign-on authentication to your applications.
Ready to automate your VPS deployments? Start your free DeployHQ trial and have your first deployment running in minutes.
Questions or need help setting up? Reach out to us at support@deployhq.com or find us on Twitter/X @deployhq.