How to install Git
Introduction
Git is the most widely used version control system in the world. Before you can start tracking changes to your code, creating repositories, or collaborating with other developers, you need to install Git on your machine.
The installation process varies by operating system. Choose your platform below:
Once installed, jump to Global Configuration to set up your identity before making your first commit. New to version control? Our Git glossary of common terms explains commits, branches, remotes, and the rest of the vocabulary you'll meet along the way.
Install Git on Windows
Option 1 - Git for Windows (Recommended)
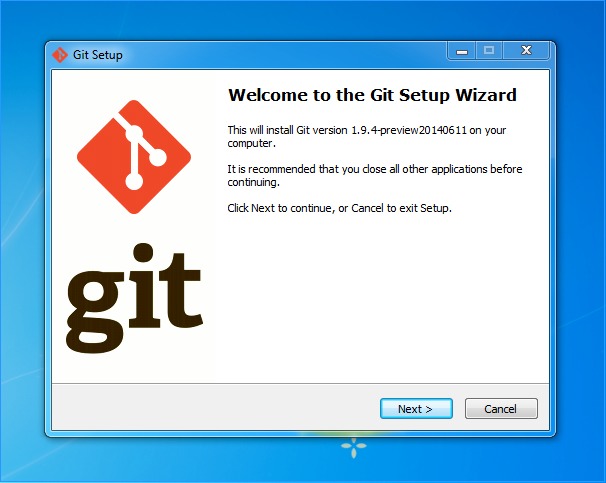
The official Git for Windows installer is the most common way to get Git on a Windows machine. It includes Git Bash, a terminal emulator that provides a Unix-like command-line experience on Windows.
Head over to gitforwindows.org, download the latest installer, and run it. The default options work well for most users, but pay attention to these settings during installation:
- Default editor: Choose your preferred text editor (VS Code is a popular choice).
- PATH environment: Select "Git from the command line and also from 3rd-party software" so you can use Git in both Command Prompt and PowerShell.
- Line ending conversions: "Checkout Windows-style, commit Unix-style line endings" is the recommended default.
Option 2 - Install with winget
If you have Windows 10 or later, you can install Git using the built-in Windows Package Manager from PowerShell or Command Prompt:
winget install --id Git.Git -e --source winget
This downloads and installs the latest version of Git for Windows automatically.
Verify installation on Windows
To verify that Git has been installed, open Command Prompt, PowerShell, or Git Bash from the Start menu.
Enter the following command:
git --version
You should see output showing the installed version:
git version 2.x.x
If you see a "command not found" error instead, see the Troubleshooting section below.
You are now ready to add some global configuration for Git.
Install Git on Mac
Option 1 - Homebrew (Recommended)
Homebrew is the most popular package manager for macOS, and it is the preferred way to install and keep Git up to date. If you do not have Homebrew installed, open Terminal and run:
/bin/bash -c "$(curl -fsSL https://raw.githubusercontent.com/Homebrew/install/HEAD/install.sh)"
Once Homebrew is installed, install Git with:
brew install git
To update Git later, run brew upgrade git. This keeps you on the latest stable release without needing to download installers manually.
Option 2 - Xcode Command Line Tools
Open the Terminal app (found in Applications > Utilities) and type:
git --version
If Git is not already installed, macOS will prompt you to install the Xcode Command Line Tools. Click Install and wait for the download to complete. This installs a version of Git maintained by Apple, though it may lag behind the latest release.
Option 3 - Git Installer for Mac
There is also an official standalone Git installer for macOS. Download it, open the installer, and follow the wizard using the default options.
Verify installation on Mac
Open Terminal and enter:
git --version
You should see output like:
git version 2.x.x
If you installed via Homebrew and still see an older Apple version, you may need to restart your terminal or adjust your shell PATH so that /opt/homebrew/bin (Apple Silicon) or /usr/local/bin (Intel) comes before /usr/bin.
You are now ready to add some global configuration for Git.
Install Git on Linux
Git is available in the default package repositories of virtually every Linux distribution, and many distros ship with Git pre-installed. Open your preferred terminal emulator and run the command for your distribution:
# Debian / Ubuntu / Linux Mint
sudo apt-get update
sudo apt-get install git

# Fedora
sudo dnf install git

# Arch Linux / Manjaro
sudo pacman -S git

# openSUSE
sudo zypper install git

# Alpine Linux
sudo apk add git
Verify installation on Linux
Run the following command to confirm Git is installed:
git --version
You should see output like:
git version 2.x.x
You are now ready to add some global configuration for Git.
Global configuration for Git
Before you start committing file changes, you should configure Git with your identity. This information is embedded in every commit you make and is visible to anyone with access to the repository.
Open Terminal (or Command Prompt / Git Bash on Windows) and run:
git config --global user.name "Your Name"
git config --global user.email "you@example.com"
Set your default branch name
Recent versions of Git default to main as the initial branch name, but you can set this explicitly to avoid warnings:
git config --global init.defaultBranch main
Set your preferred editor
Git occasionally opens a text editor for commit messages and interactive operations. Set your preferred editor:
# VS Code
git config --global core.editor "code --wait"

# Nano
git config --global core.editor "nano"

# Vim (default on most systems)
git config --global core.editor "vim"
Verify your configuration
To review all of your Git settings, run:
git config --list
This reads from the .gitconfig file in your home directory, which will look similar to:
[user]
    name = Your Name
    email = you@example.com
[init]
    defaultBranch = main
[core]
    editor = code --wait
Both your name and email address will be visible to anyone who has access to your repositories, so make sure you use an email address you are comfortable sharing.
Troubleshooting common issues
Windows: "git is not recognized" error
If you see 'git' is not recognized as an internal or external command after installation, Git is not in your system PATH. Try these fixes:
- Restart your terminal or computer to pick up PATH changes from the installer.
- Re-run the installer and ensure you select the option to add Git to your PATH.
- Manually add Git to PATH: Open System Properties > Environment Variables, then add
C:\Program Files\Git\cmdto yourPathvariable.
Mac: Xcode license agreement error
If you see a message about accepting the Xcode license, run:
sudo xcodebuild -license accept
Then try your Git command again.
Mac: Homebrew Git vs. Apple Git
After installing Git via Homebrew, your shell may still use the older Apple version from /usr/bin/git. Check which version is active:
which git
If it shows /usr/bin/git instead of /opt/homebrew/bin/git (Apple Silicon) or /usr/local/bin/git (Intel), add the Homebrew path to your shell profile (~/.zshrc or ~/.bash_profile):
export PATH="/opt/homebrew/bin:$PATH"
Restart your terminal and verify with git --version.
Linux: permission denied errors
If you see "permission denied" when installing packages, make sure you are using sudo with the install command. If you encounter permission errors when running Git commands on a repository, check the directory ownership:
ls -la /path/to/your/repo
You can fix ownership with:
sudo chown -R $(whoami) /path/to/your/repo
Next steps
Now that Git is installed and configured, you are ready to start using version control:
- Create your first repository to start tracking files
- Learn how to commit changes to save snapshots of your work
- Clone an existing repository to work on a project that is already hosted remotely
- Explore branching and merging to work on features in isolation
- Publish your changes to share your work with your team
Ready to streamline your deployment workflow? DeployHQ automatically deploys your code whenever you push to your Git repository — no manual uploads needed.