Getting Git running shouldn't take an afternoon. This guide walks through installing Git on Windows, macOS, and Linux in under 10 minutes — then covers the post-install configuration most tutorials skip: identity, line endings, credential helpers, and SSH keys for the platforms you'll actually push to.
Before you start
You need a working terminal, admin or sudo access, and an internet connection. By the end you'll have:
- Git installed and on your
PATH - Identity configured so commits attribute correctly
- A sensible default branch (
main) and line-ending behavior for your OS - An SSH key registered with GitHub, GitLab, or Bitbucket
- A working
git cloneagainst a real remote
Pick the install path that fits your environment.
Install Git on Windows
The official installer (Git for Windows) is the most complete option because it bundles Git Bash, the Git Credential Manager, and a working OpenSSH client. Two package-manager paths — winget and Chocolatey — work if you're scripting setup across multiple machines.
Option 1: The official Git for Windows installer
Download from git-scm.com/downloads and run it. Most defaults are fine, but a few choices matter:
- Default editor: pick whatever you already use. If you don't have a preference, choose Nano — it's the simplest to exit.
- Initial branch name: tick
Override the default branch name for new repositories
and set it tomain. The historicalmasterdefault has been phased out across GitHub, GitLab, and Bitbucket. - Line endings: choose
Checkout Windows-style, commit Unix-style line endings
— the safe cross-platform default. - Credential helper: leave Git Credential Manager selected. It handles OAuth flows for GitHub and Azure DevOps automatically.
Option 2: winget
winget install --id Git.Git -e --source winget
Installs the same Git for Windows package with default options. Re-open your terminal so git is on your PATH.
Option 3: Chocolatey
choco install git -y
Same package, different package manager. Run from an elevated PowerShell prompt.
Git Bash vs PowerShell: Git for Windows installs a Bash shell (Git Bash) alongside the Windows tools. You can run git from PowerShell or Windows Terminal — Git Bash is only useful if you want POSIX tools (ssh, grep, curl) in a Unix-style prompt. Most Git tutorials assume a Bash prompt, so new users often default to it.
Install Git on macOS
Homebrew is the standard recommendation — it keeps Git current and is easy to upgrade.
Option 1: Homebrew (recommended)
If you don't have Homebrew, install it from brew.sh. Then:
brew install git
Homebrew installs into /opt/homebrew/bin (Apple Silicon) or /usr/local/bin (Intel). Upgrade later with brew upgrade git.
Option 2: Xcode Command Line Tools
If you've installed Xcode or the Command Line Tools for any other reason, you already have Git:
xcode-select --install
The Apple-supplied Git lags upstream by months — sometimes years. Fine for basic commands, but most macOS developers install Homebrew's Git on top, which then takes precedence on PATH.
Option 3: Official installer
The official .pkg installer is hosted on the same git-scm.com downloads page linked above. Useful for managed Macs where Homebrew isn't allowed, slower than upstream.
Install Git on Linux
Every major distribution ships Git in its default repos. The version depends on the distro's release cycle — if you need recent features like the new reftable backend coming in Git 3.0, build from source.
Ubuntu and Debian
sudo apt update
sudo apt install git
Debian stable lags upstream by one or two minor versions. For a newer Git on Ubuntu, the official Git PPA gets you closer to the latest release:
sudo add-apt-repository ppa:git-core/ppa
sudo apt update
sudo apt install git
Fedora, RHEL, Rocky, AlmaLinux
sudo dnf install git
On older RHEL-family systems still using yum:
sudo yum install git
Arch and Manjaro
sudo pacman -S git
Arch ships the latest stable Git within days of release.
openSUSE
sudo zypper install git
Build from source (I want the absolute latest
)
If your distro's package is too old, build from source. You'll need build tools and a few libraries first:
# Ubuntu/Debian
sudo apt install dh-autoreconf libcurl4-gnutls-dev libexpat1-dev \
  gettext libz-dev libssl-dev make gcc

# Fedora/RHEL
sudo dnf install dh-autoreconf curl-devel expat-devel gettext-devel \
  openssl-devel perl-devel zlib-devel make gcc
Then build:
git clone https://github.com/git/git.git
cd git
make prefix=/usr/local all
sudo make prefix=/usr/local install
This installs to /usr/local/bin/git, which takes precedence over any package-manager copy.
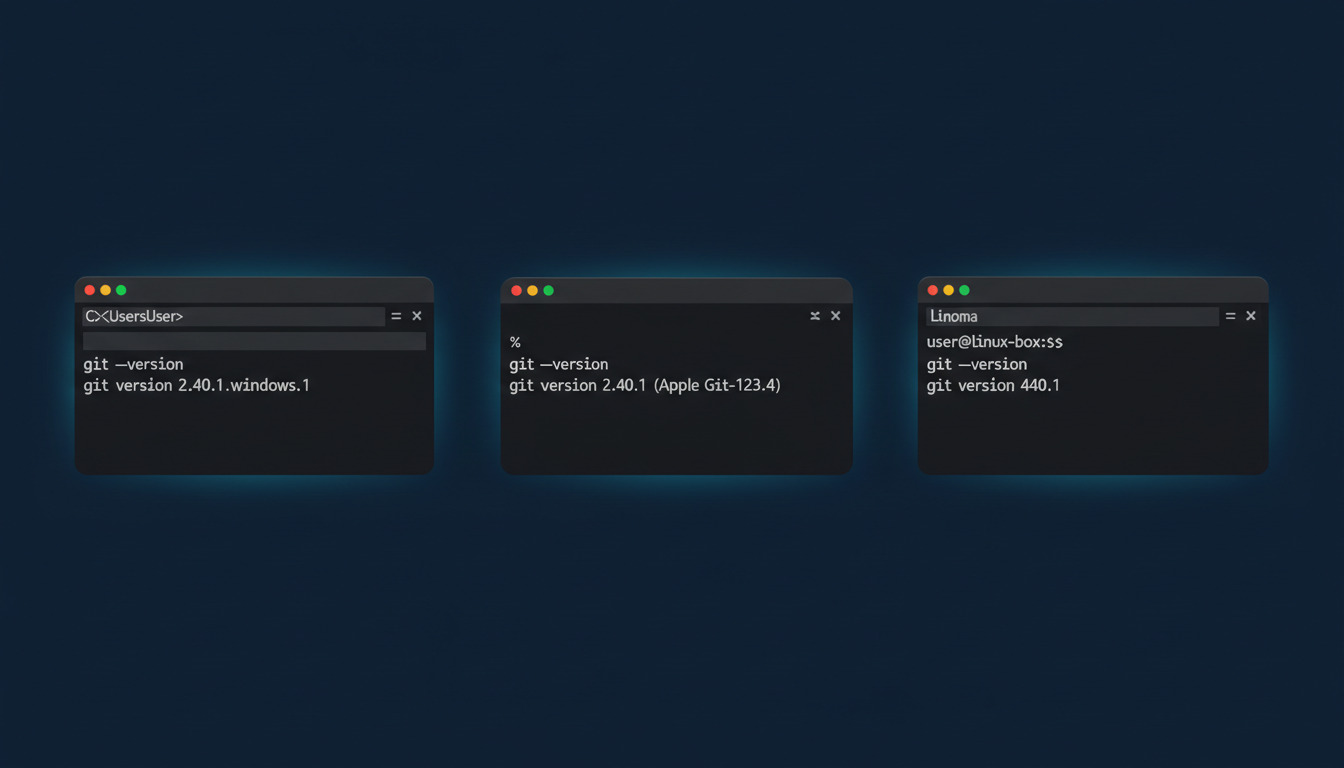
Verify the installation
Open a new terminal and run:
git --version
You should see something like git version 2.47.0 (the exact number depends on when you installed). If you get command not found
, jump to Common installation issues below — it's almost always a PATH problem.
Now that Git is working on your machine, the next step most developers want is automating what happens after
git push. See how DeployHQ automates deployments directly from your Git repository — every push to a chosen branch can build, package, and ship to your server without manual SSH steps.
Essential post-install configuration
Most install guides stop at git --version. That's a mistake — out of the box, Git doesn't know who you are, what editor to launch, or how to handle line endings on a mixed-OS team. Run these once on every new machine.
1. Identity (required for every commit)
git config --global user.name "Your Name"
git config --global user.email "you@example.com"
Use the email you registered with your Git host so commits attribute to your account. For separate work and personal identities, override per-repo with git config --local.
2. Default branch name
git config --global init.defaultBranch main
Without this, git init creates master, which all three major hosts have moved away from.
3. Line endings
The right setting depends on your OS:
# Windows
git config --global core.autocrlf true

# macOS and Linux
git config --global core.autocrlf input
autocrlf true converts to CRLF on checkout and back to LF on commit (Windows). autocrlf input only converts on commit (Unix-like). Cross-platform teams should also commit a .gitattributes file pinning per-extension behavior, but autocrlf is the right global default.
4. Default editor
# VS Code
git config --global core.editor "code --wait"

# Vim
git config --global core.editor vim

# Nano
git config --global core.editor nano
This is the editor Git launches for commit messages, interactive rebases, and merge conflict resolution. Use whatever you already use day-to-day.
5. Credential helper
You want Git to remember your credentials so you're not retyping a token every push:
# Windows — already configured if you used the official installer
git config --global credential.helper manager

# macOS — uses the Keychain
git config --global credential.helper osxkeychain

# Linux — cache in memory for 1 hour
git config --global credential.helper "cache --timeout=3600"

# Linux — persist to disk (less secure, more convenient)
git config --global credential.helper store
credential.helper store writes credentials to ~/.git-credentials in plaintext. Acceptable on a personal machine with an encrypted home directory; don't use it on a shared host. The cleanest long-term answer is SSH keys (next section) — no HTTPS token to store at all.
6. Pull behavior
Recent Git versions prompt you to pick a default for git pull. Set it explicitly so the prompt goes away:
git config --global pull.rebase false   # merge — the historical default
# or
git config --global pull.rebase true    # rebase — cleaner linear history
# or
git config --global pull.ff only        # fast-forward only, refuse to merge or rebase
pull.ff only is the safest choice for solo work — it forces you to be deliberate when histories diverge. Teams using a trunk-based or GitHub Flow branching strategy often prefer pull.rebase true for linear history.
Confirm everything: git config --global --list.
Set up SSH keys for GitHub, GitLab, and Bitbucket
HTTPS works, but SSH is friction-free: one key, no passwords, no expiring tokens.
Generate a key
ssh-keygen -t ed25519 -C "you@example.com"
Ed25519 is the modern recommendation — smaller, faster, more secure than RSA. Press Enter to accept the default file location (~/.ssh/id_ed25519) and optionally set a passphrase. On older systems that don't support Ed25519, use ssh-keygen -t rsa -b 4096 -C "you@example.com".
For a deeper look at key algorithms and managing multiple keys, see 5 ways to create SSH keys from the command line.
Add the key to your ssh-agent
# Start the agent
eval "$(ssh-agent -s)"

# Add the key
ssh-add ~/.ssh/id_ed25519
On macOS, you can have the Keychain remember the passphrase:
ssh-add --apple-use-keychain ~/.ssh/id_ed25519
Copy the public key
# macOS
pbcopy < ~/.ssh/id_ed25519.pub

# Linux (X11)
xclip -selection clipboard < ~/.ssh/id_ed25519.pub

# Windows (PowerShell)
Get-Content $HOME\.ssh\id_ed25519.pub | Set-Clipboard
Paste the public key into your account's SSH key settings — GitHub at Settings → SSH and GPG keys, GitLab at Preferences → SSH Keys, Bitbucket at Personal settings → SSH keys.
Test the connection
ssh -T git@github.com
A successfully authenticated
message with your username means you're ready to clone over SSH. The same ssh -T test works against git@gitlab.com and git@bitbucket.org.
Common installation issues
git: command not found
after install
PATH problem. The installer wrote git to a location your shell doesn't search.
- Windows: open a new terminal — the existing one cached the old
PATH. If it still fails, check System Properties → Environment Variables for an entry pointing atC:\Program Files\Git\cmd. - macOS (Homebrew): confirm
/opt/homebrew/bin(Apple Silicon) or/usr/local/bin(Intel) is in yourPATH. Runbrew --prefix gitto see where Homebrew put it. - Linux: the package puts
gitin/usr/bin/git, which is always onPATH. Ifcommand -v gitreturns nothing, the install failed — re-run withsudoand watch the output.
Windows Credential Manager prompt loop
A known frustration: every git push to a private GitHub repo pops the credential manager, even after you've authenticated. Two fixes:
- Update Git Credential Manager — older bundled versions had buggy token caching against GitHub's newer auth flow. Reinstall the latest Git for Windows.
- Switch to SSH —
git remote set-url origin git@github.com:owner/repo.git. The credential manager isn't involved with SSH, so the loop disappears.
Permission denied (publickey) when pushing
Either the SSH key isn't loaded in your agent (ssh-add -l should list it), or the key on the server doesn't match. Run ssh -vT git@github.com and look at the Offering public key
lines — that's the one being sent. If your account doesn't have a matching key, the server rejects the auth.
Distro's Git version is too old
git switch, git restore, partial clone, and other modern features need Git 2.23+. Debian stable and RHEL ship older versions. Options, in order of preference: the Git PPA (Ubuntu), Homebrew on Linux (yes, Linuxbrew works), or build from source.
What's next: deploy your code
Once Git is installed and configured, the natural next move is using it. A few things worth doing on your first day:
- Create your first repository — the canonical
git init,git add,git commitwalkthrough. - Branch and merge confidently — the workflow every team eventually settles into.
- Pick a branching strategy — GitHub Flow, GitFlow, or trunk-based, depending on your team size.
- Understand GitOps — using Git as the source of truth for both code and infrastructure.
If you want a one-page command reference covering install, clone, commit, and push, the DeployHQ install Git tutorial is the quick lookup.
Once you've got a real project under version control, the next question is how it gets to a server. Manual SCP and SSH work for a single environment, but the moment you have staging plus production — or more than one developer — you want git push to trigger a deploy automatically. DeployHQ is an automated deployment tool that connects to GitHub, GitLab, or Bitbucket and ships every commit to your server, with automatic deployment from Git, full deploy history, and one-click rollback.
Working with AI coding agents day-to-day? You can also deploy from your terminal — the DeployHQ agents CLI bridges Claude Code or Codex and your live infrastructure. For the AI-plus-Git workflow, see how to use Git with Claude Code. For a full walkthrough of Git-based deploys to your own server, the Git-based deployment on a VPS guide covers SSH hardening, webhooks, and zero-downtime releases.
Wrapping up
Installing Git is the easy part — the post-install steps (identity, line endings, credentials, SSH keys) are what separate a working machine from one you'll fight every week. Run through this guide once on every new laptop and you won't think about Git tooling again for a long time.
Ready to turn those commits into shipped code? Get a continuous deployment platform running in under 10 minutes — free to try.
Questions? Email support@deployhq.com or find us on Twitter at @deployhq.