
Deploy WordPress Theme with Git
This guide will take you through how to automatically deploy a Wordpress site straight from your Git repository using DeployHQ. Whilst there are a couple of different ways of doing this, we'll just be focusing on how to update a specific theme.
We will assume that you only have your WordPress theme committed to Git, and the rest of the installation is managed separately.
Deploying with DeployHQ
DeployHQ is a service that allows you to easily deploy applications to your servers. You can write config files, define custom commands and deploy automatically whenever you push.
The free plan allows you deploy 1 project up to 10 times a day!
Create a project
After signing up and logging in, create a project by going to Projects > New Project.
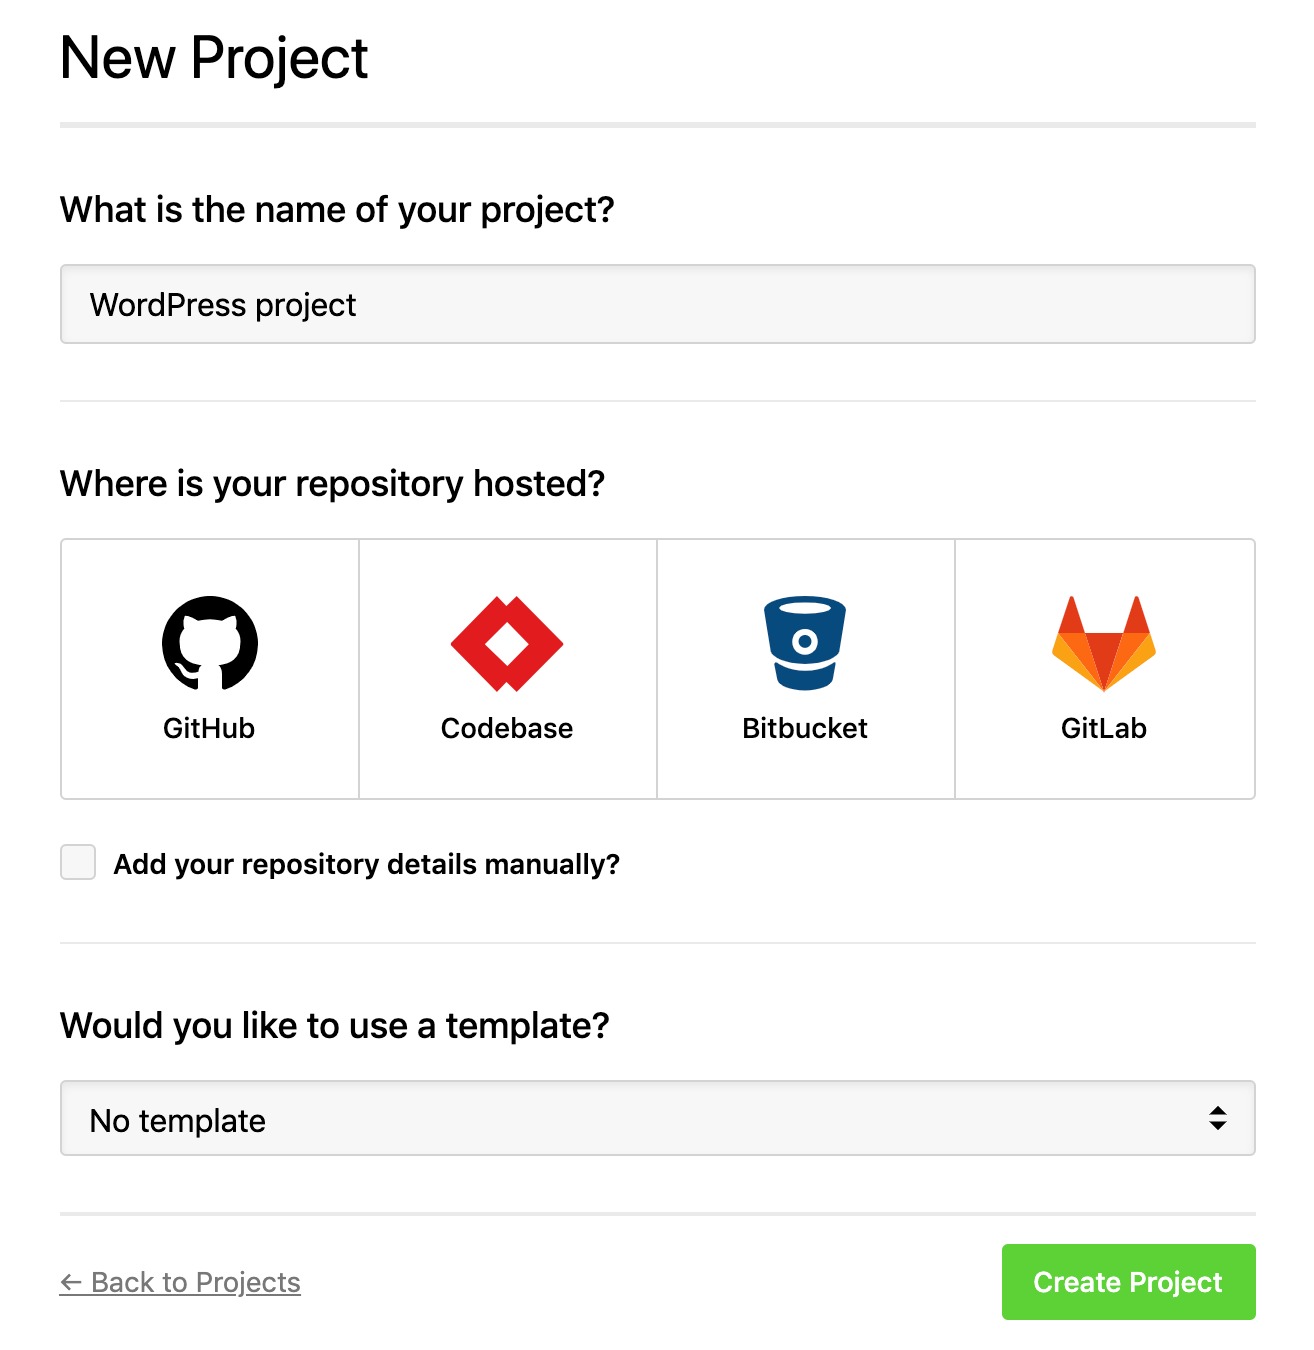
Follow the wizard and choose your repository. If you have any trouble connecting your repository, please see our support page.
Configure a server
Now we need to tell DeployHQ where to deploy the theme to. To do this, we need to create a server by going to Servers > New Server.
Enter a description for your new server, then select the protocol that you'll be using to connect:
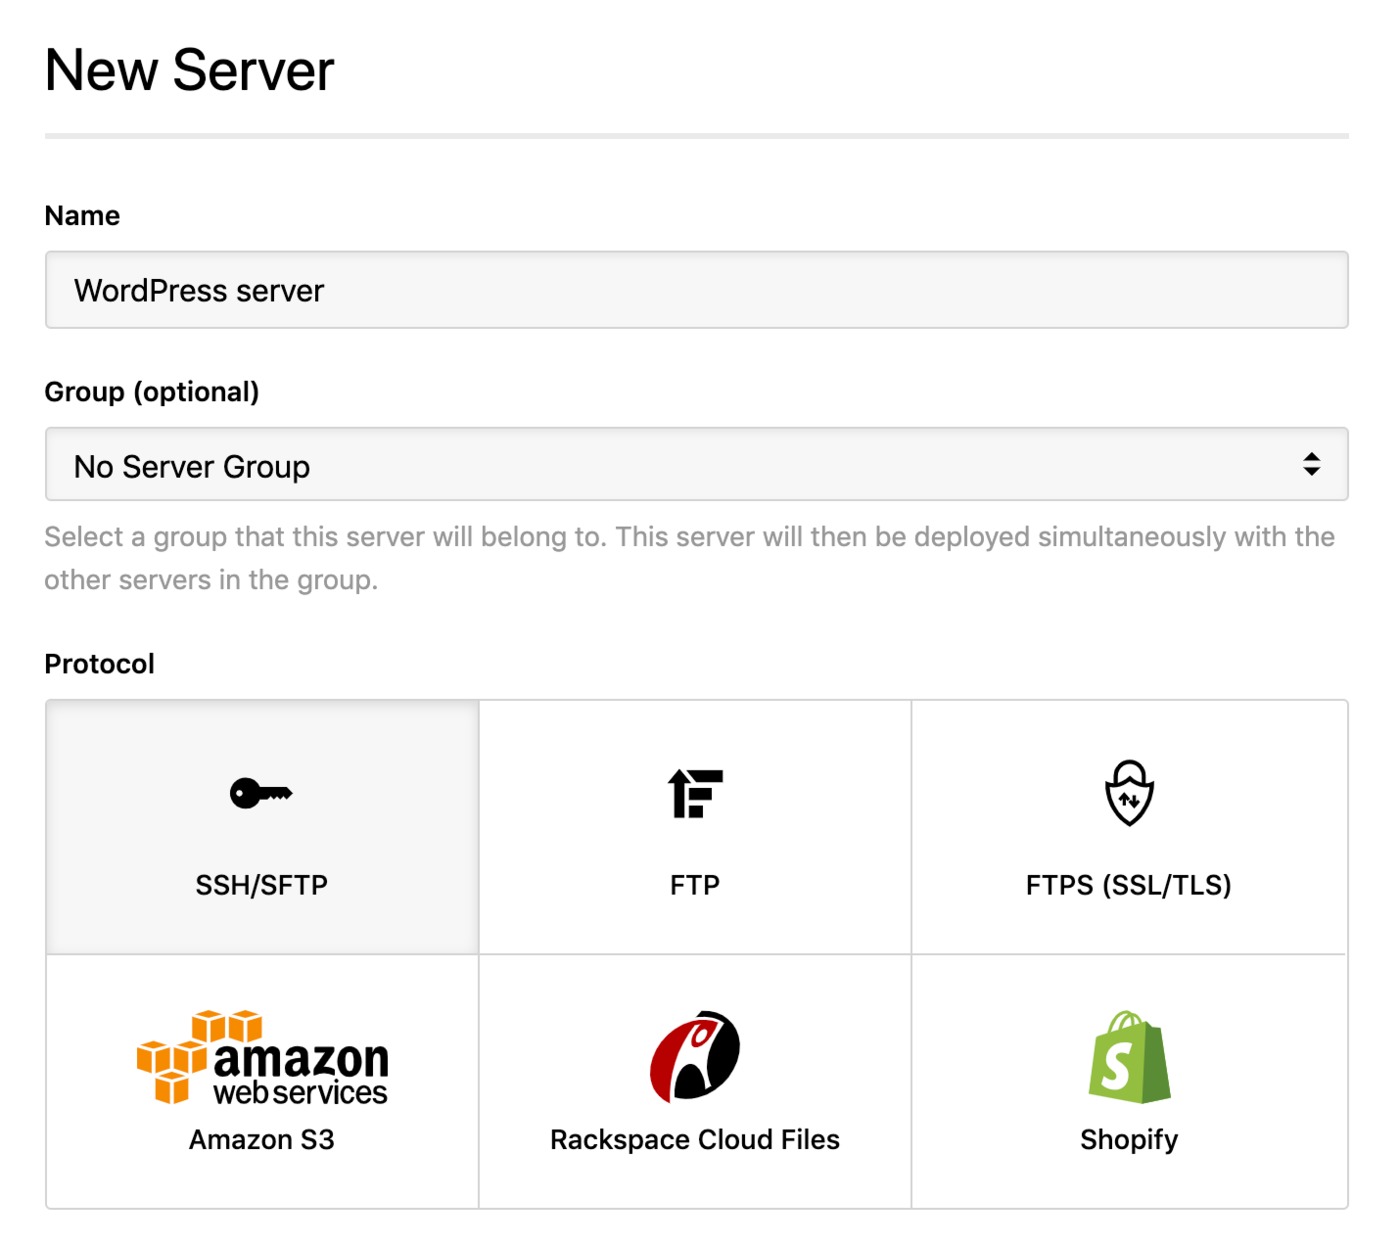
In this case, we'll be connecting via SFTP. Enter the hostname for your server, followed by the username and password. We've left the connection port blank to just use the standard port for SFTP - 22.
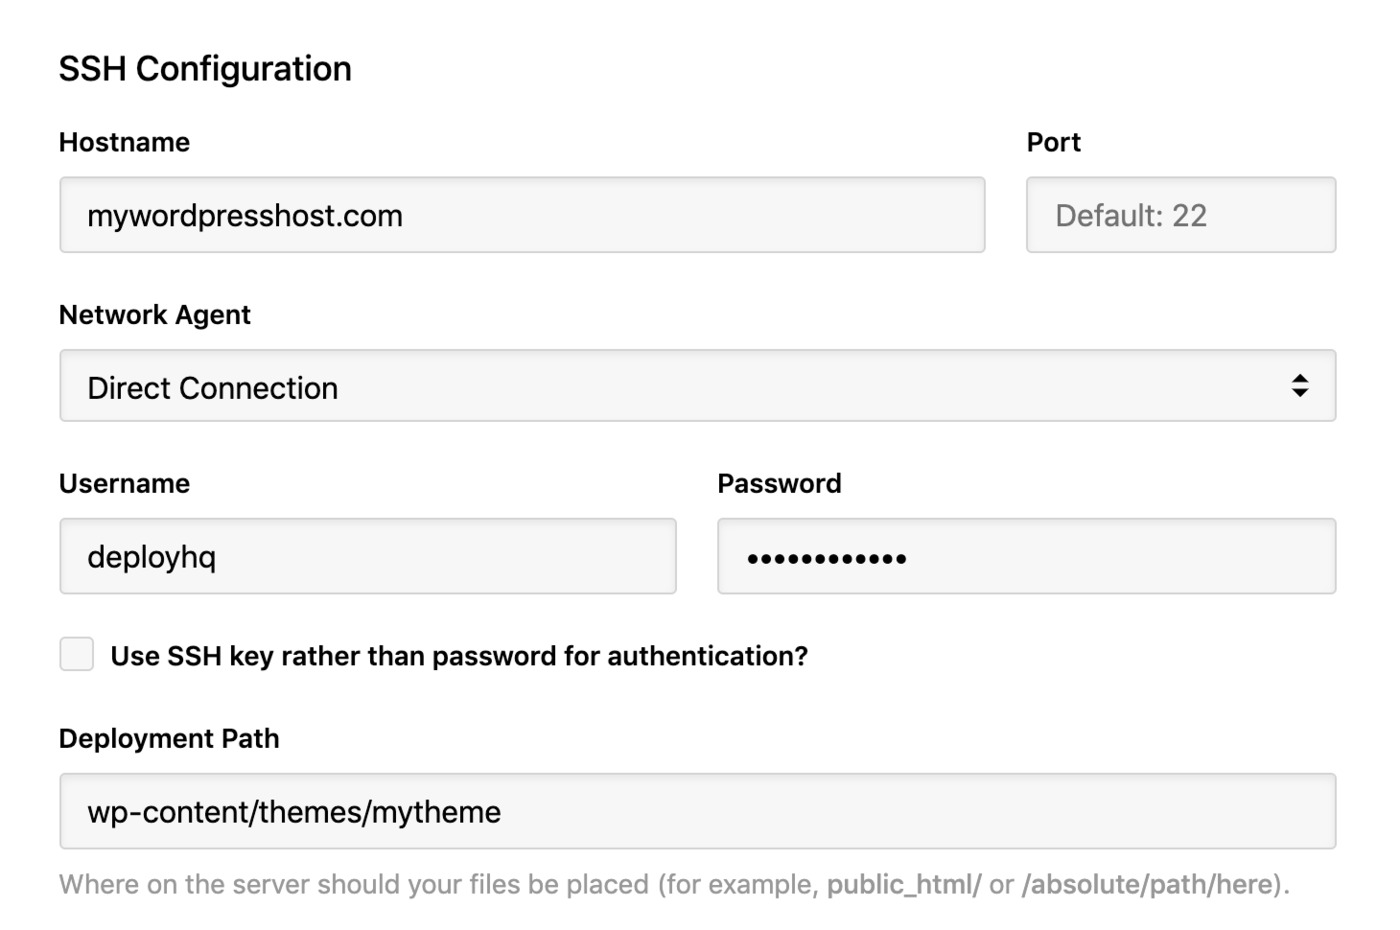
Then, you just need to enter the path to your theme directory as the Deployment Path. This will normally be in the format wp-content/themes/mytheme but you may need to prefix the path with additional directories if your hosting provider requires it.
Next, within Deployment options you can enable the checkbox to automatically deploy to this server, and enter an optional deployment subdirectory. This tells DeployHQ to only deploy files from within a specific folder. As we've only committed our WordPress theme to Git, we'll leave this blank.
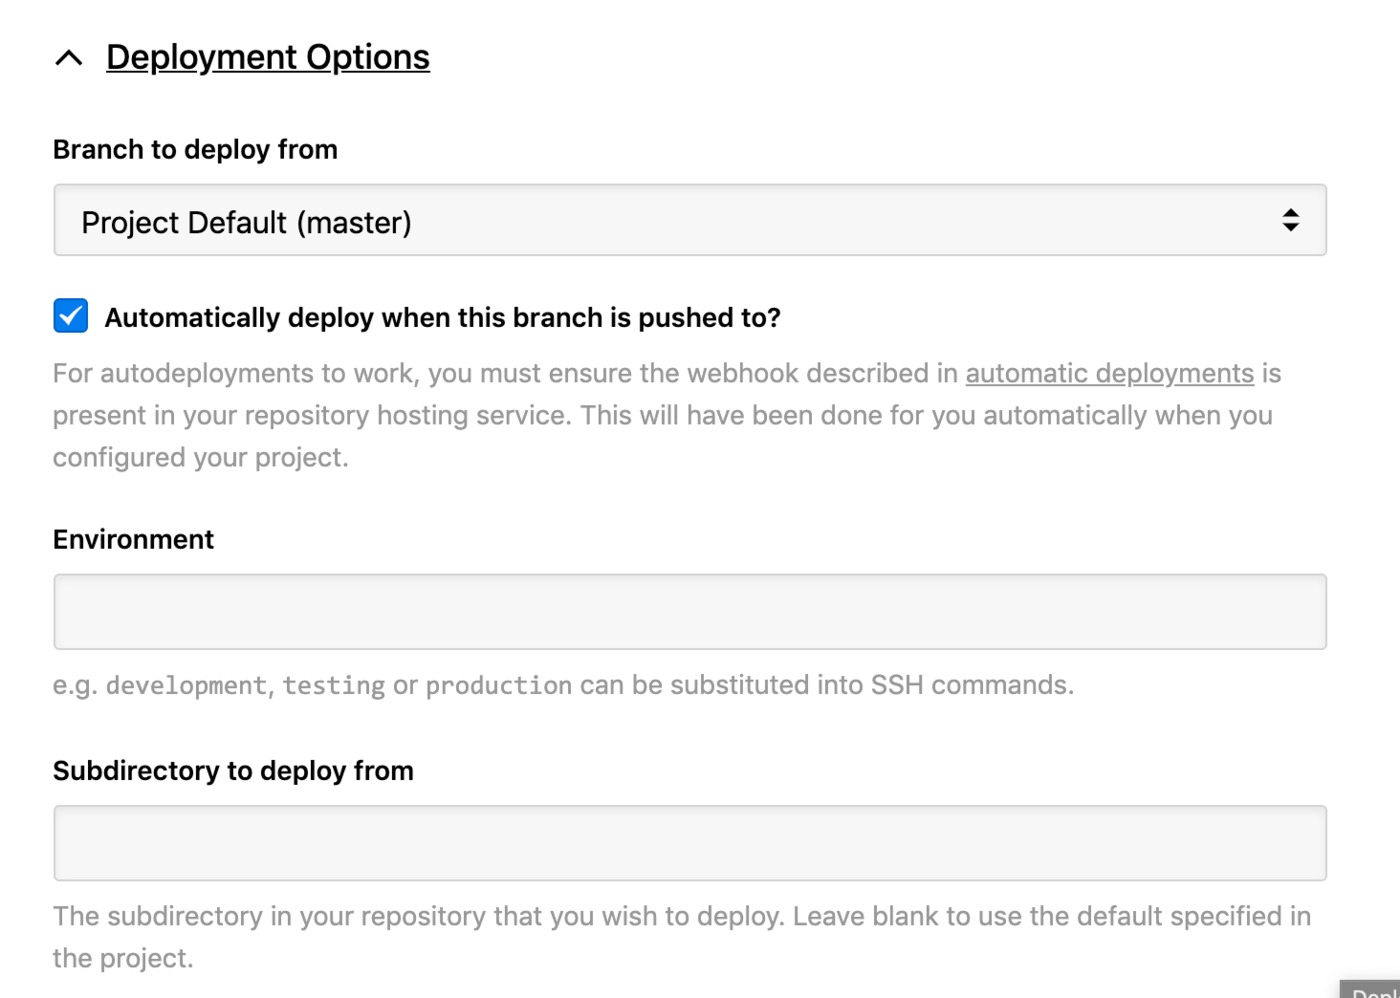
Click Create server at the bottom of the page, then you can proceed to run your first deployment.
We do have a number of specific guides for connecting to web hosting providers that specialise in managed WordPress sites, which you can locate in our main guides area.
For more general assistance with adding a server, you can read through this area in our main documentation.
Deploy for the first time
Now you've finished configuring your project, it's time to deploy.
Click Deploy Project in the header.
The server you created should be preselected, along with the start and end revisions. Once you’re happy with everything, scroll down and click Deploy to begin the deployment.
Now sit back, relax and look very smug. You’ve just saved yourself bags of time.
If you’ve got any other projects you’d like to automate deployments for, we’ve written lots of guides for deploying the most popular application frameworks and content management systems.
Further reading
DeployHQ has a number of very useful features to help with your deployments in general that you might wish to find out more about:
- Compiling assets and javascript with the Build pipeline
- Running commands, using tools as WP-CLI on your server with SSH commands
- Stop certain files from being uploaded in deployments using Excluded files
- Keep important files such as your wp-config.php file safely away from your repository using Config files
- Keep your team in the loop and run other useful tasks during a deployment with our Integrations