Creating a project
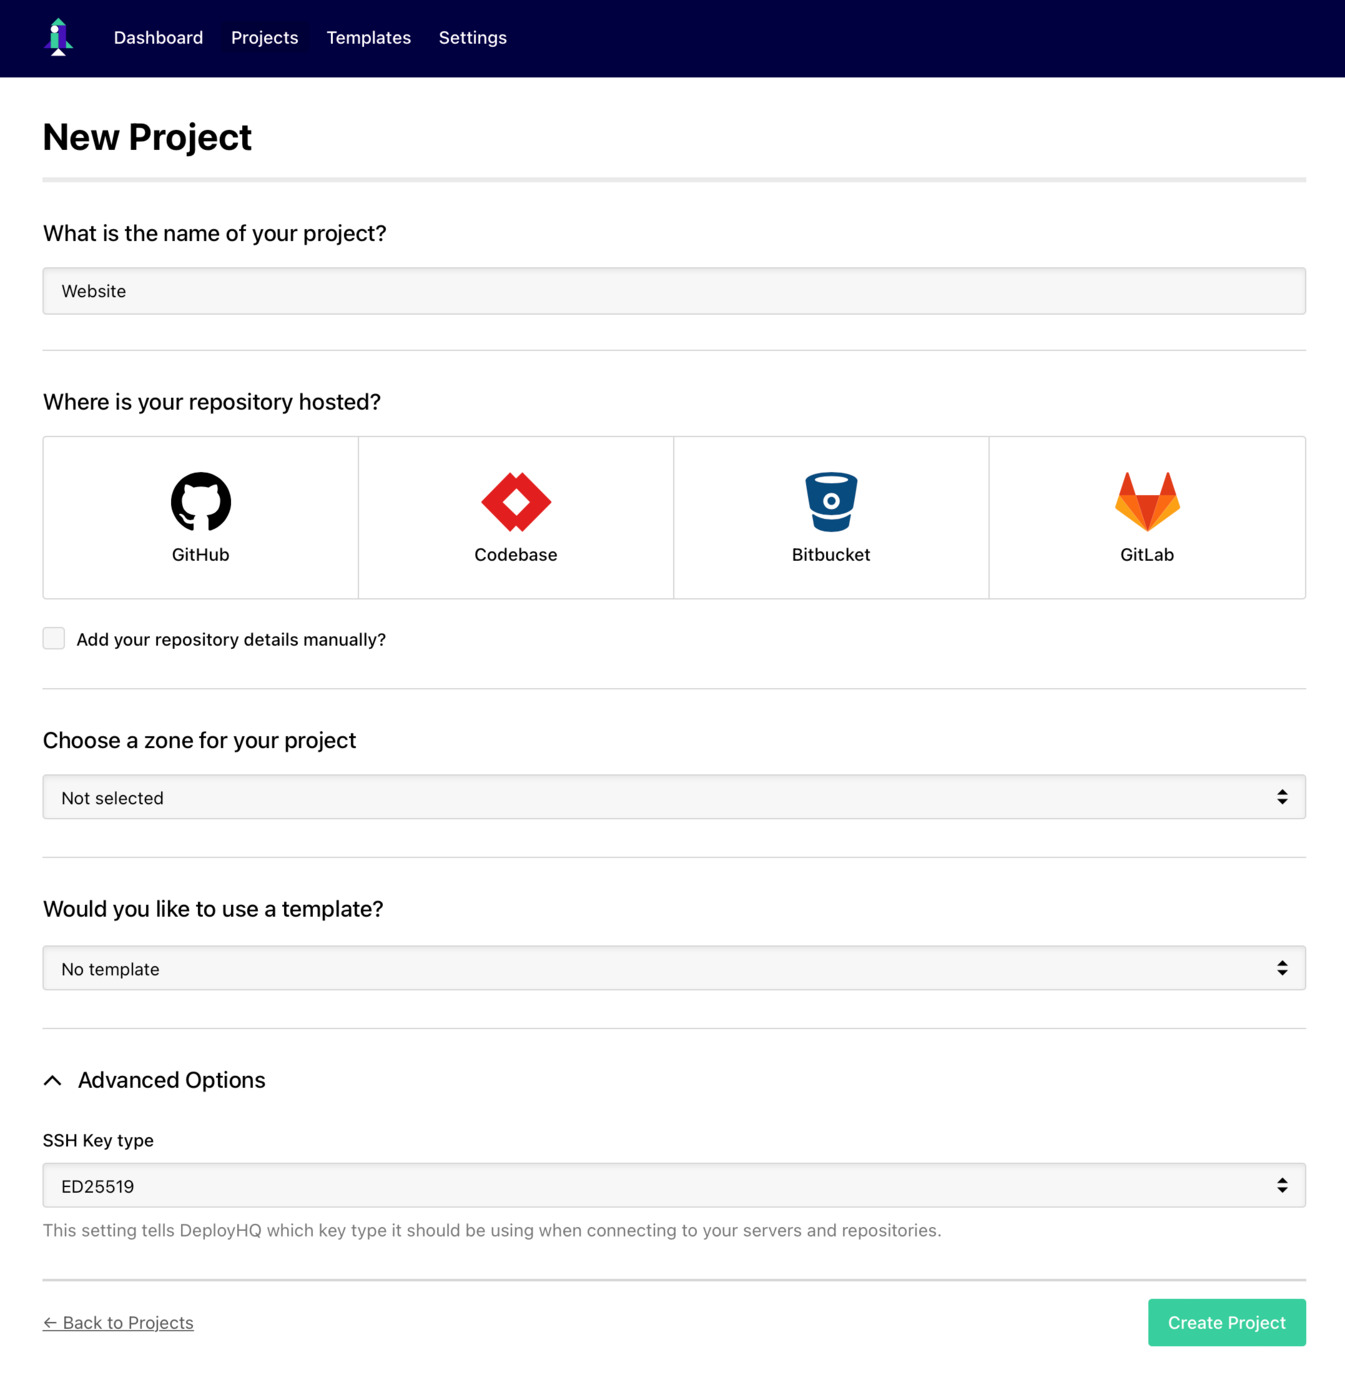
To create your new project, head to the Projects tab at the top of the screen, then click New Project on the right hand side of the page:

Enter a name, then choose from one of the supported SCMs if you have your code hosted there. If choosing a supported SCM, you'll also have the option to add an automatic deployment hook directly to the repository when selecting it.
Otherwise, if you're using a different service or hosting the repository on your own servers, you can choose the option to Manually enter repository details.
- Adding a Bitbucket repository
- Adding a Codebase repository
- Adding a GitHub repository
- Adding a GitLab repository
- Adding a repository manually
Then if you want to take advantage of a Template at this stage, you can choose from:
- Public Framework Templates - Pre-configured templates for popular frameworks like React, Vue.js, Laravel, Django, WordPress and more. Learn more about public framework templates.
- Your Private Templates - Custom templates you've created for your team. See the templates section for more details on creating private templates.
Next, you can choose from a series of Zones to keep your project in. According to the selected zone, deployments will originate from a server in that geographic location. You can find out more information about Zones in our FAQ article.
Finally, under "Advanced Options", you will see a dropdown allowing you to select the type of SSH key generated for your project upon creation. The default will be ED25519, however you can choose RSA if needed.
See the list of common repository issues if you have any trouble connecting your repository.