Deploy Laravel with DeployHQ: A Simple Guide
Using DeployHQ, you can create a simple process to be able to automate deployments of your Laravel site.
This guide assumes you already have a hosted server in place with Laravel installed. You can find a useful set of guides for how to install it in Laravel's documentation.
New in 2026 — Managed VPS hosting: DeployHQ now offers Managed VPS Hosting — fully-managed Linux servers with built-in CI/CD. For the managed path (provision the server from inside DeployHQ, no BYO setup), this is the simplest option. The walkthrough below covers BYO-server deployment, which remains fully supported.
Deploying with DeployHQ
DeployHQ is a service that allows you to easily deploy applications to your servers. You can write config files, define custom commands and deploy automatically whenever you push.
The free plan allows you deploy 1 project up to 10 times a day!
Create a project
After signing up and logging in, create a project by going to Projects > New Project.
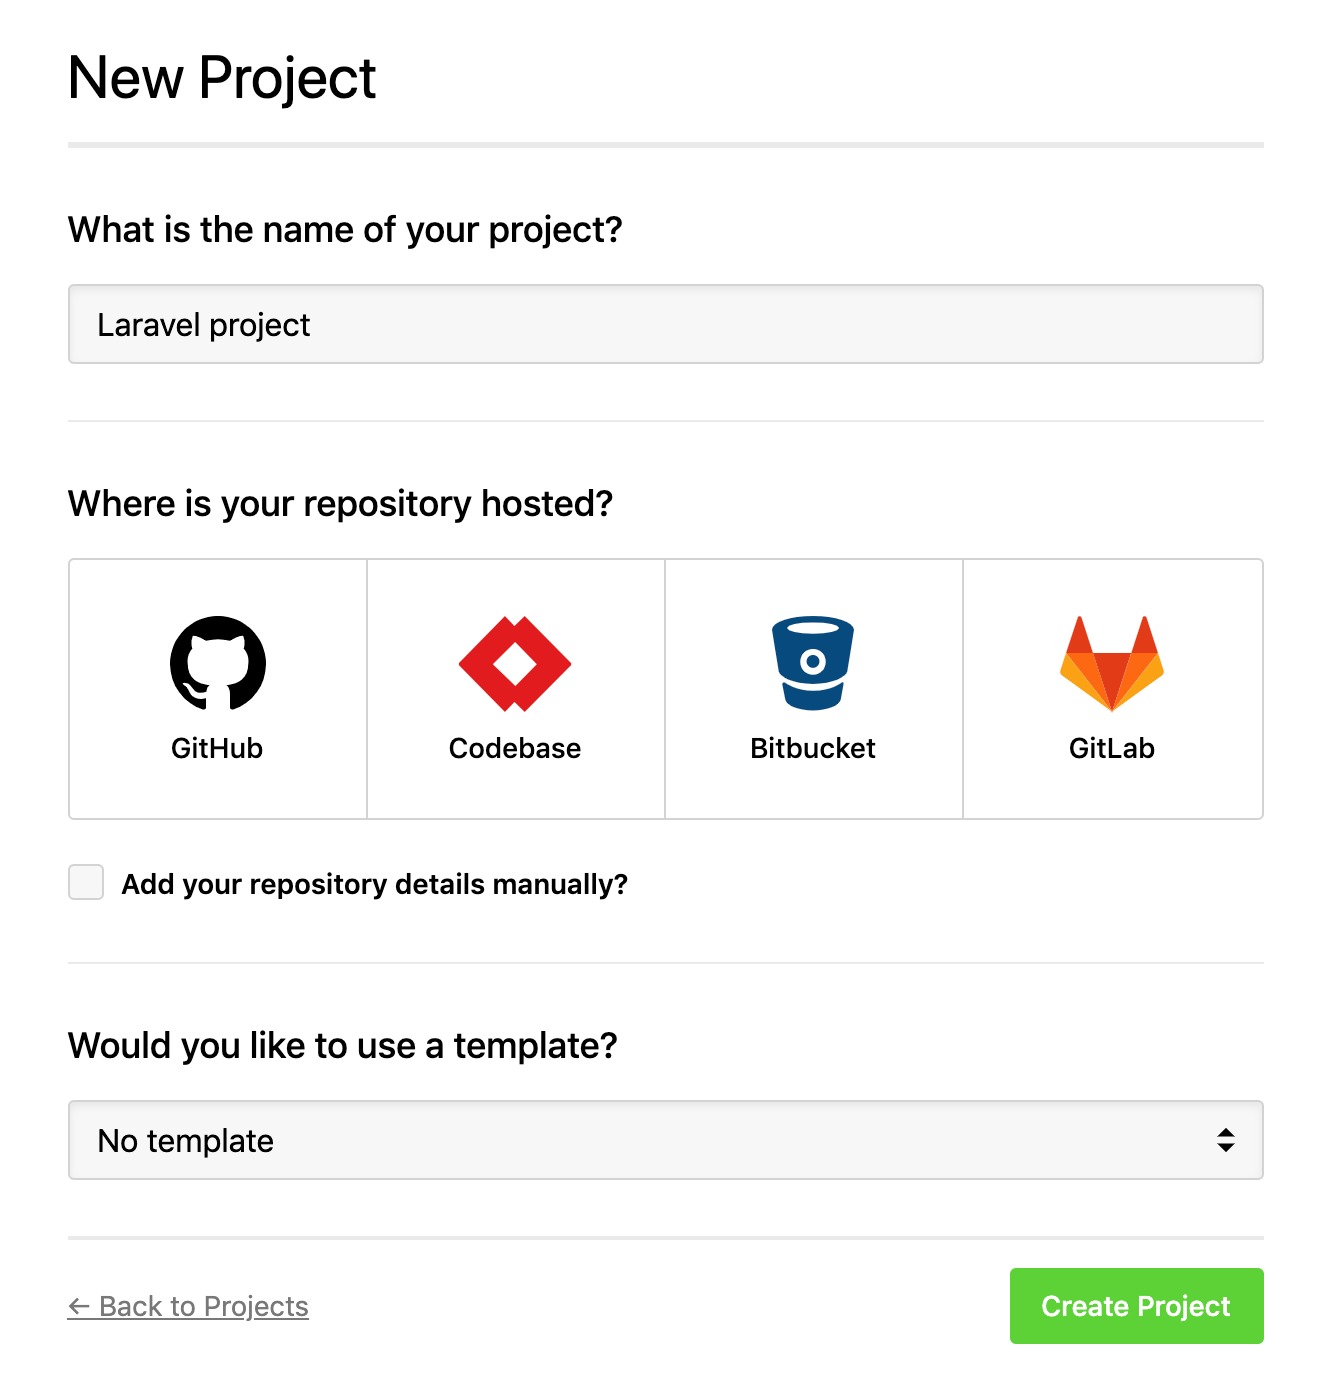
Follow the wizard and choose your repository. If you have any trouble connecting your repository, please see our support page.
Make a user for DeployHQ
For security, we recommend that you create a separate user in your server to be used for deployments.
sudo adduser deployhq
sudo usermod -a -G www-data deployhq
Configure a server
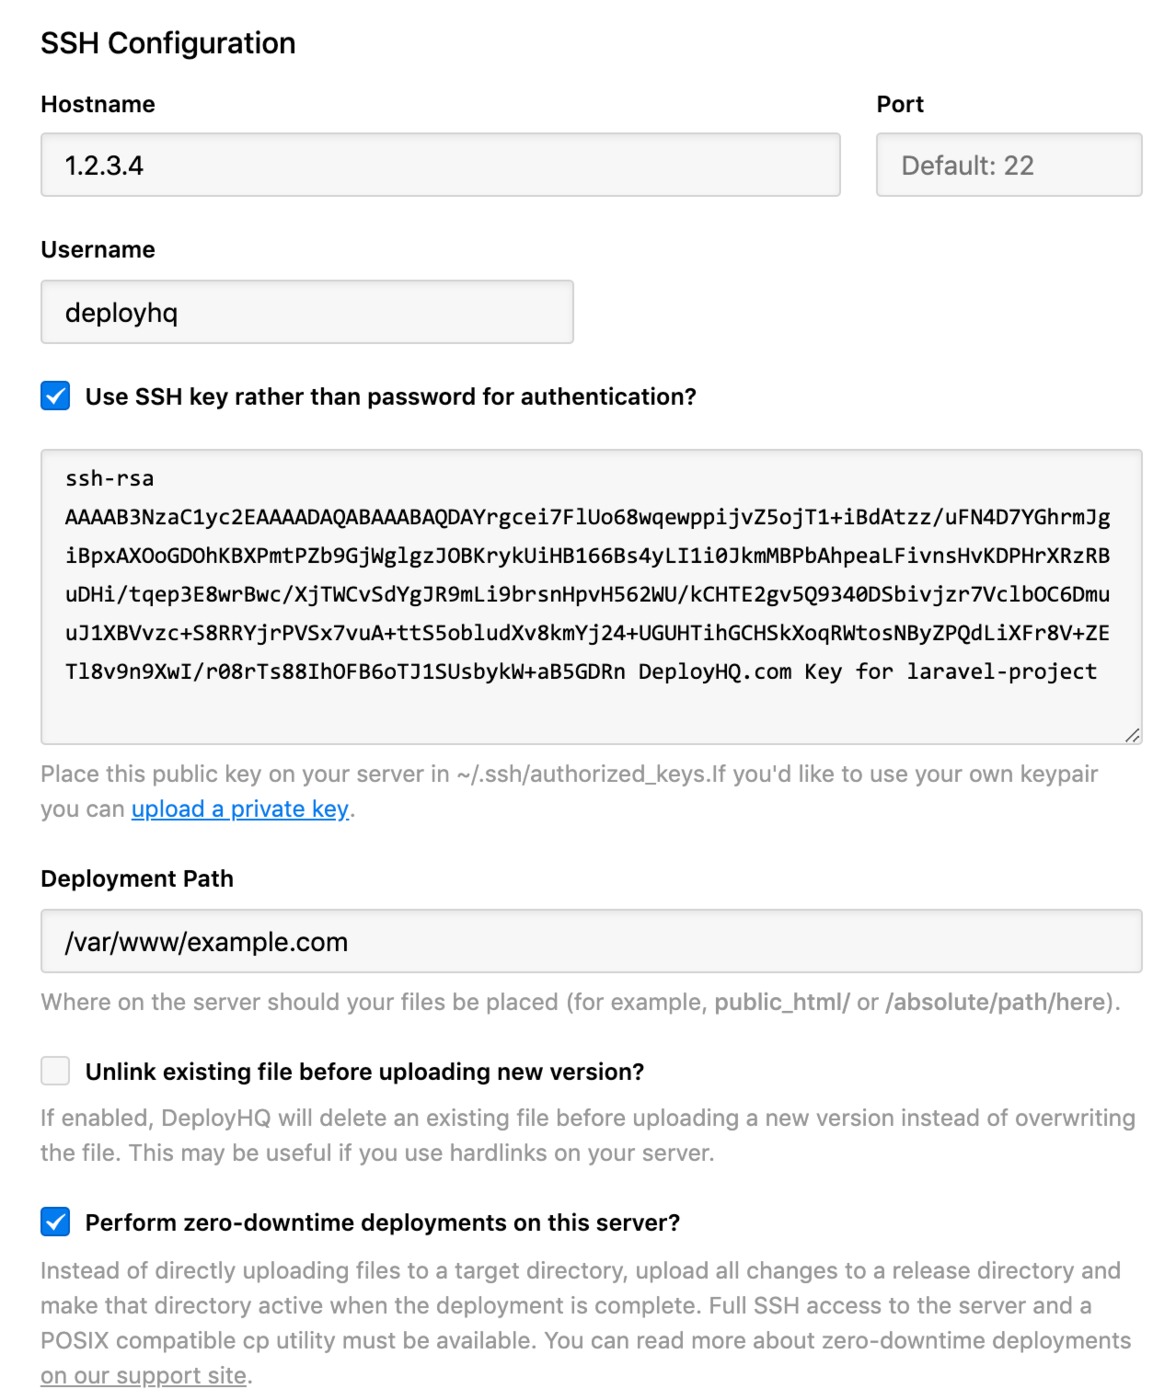
Now we need to tell DeployHQ where to deploy the application to. To do this, we need to create a server by going to Servers > New Server. In the case of this guide, the server is configured with SSH, but you can check our documentation on how to set up your server with other protocols.
Enter a memorable name for your server and select SSH from the list of protocols.
Enter the IP address for your server into the Hostname field.
The Username should be deployhq.
Check Use SSH key rather than password for authentication? then run the following commands on your server:
su - deployhq
mkdir ~/.ssh
chmod 700 ~/.ssh
nano ~/.ssh/authorized_keys
Paste DeployHQ's public key, then press Ctrl + X, y then Enter to save.
Finally, run the following command to set the correct permissions on the authorized_keys file.
chmod 600 ~/.ssh/authorized_keys
Set the Deployment Path to /var/www/example.com, and enable the option to Perform zero-downtime deployments on this server.
The zero-downtime option will take care of ensuring the previous version of your application stays live and running until the moment the deployment has finished, and you can find out more about this process in our documentation.
By enabling this, your application files will actually live in a path like /var/www/example.com/current so you'll need to update your web server configuration as appropriate.
Finally, enter production in the Environment field and ensure you enable the option to automatically deploy.
Once that's all done, press Save.
Note: If you have any trouble connecting to your server, please check out our support page.
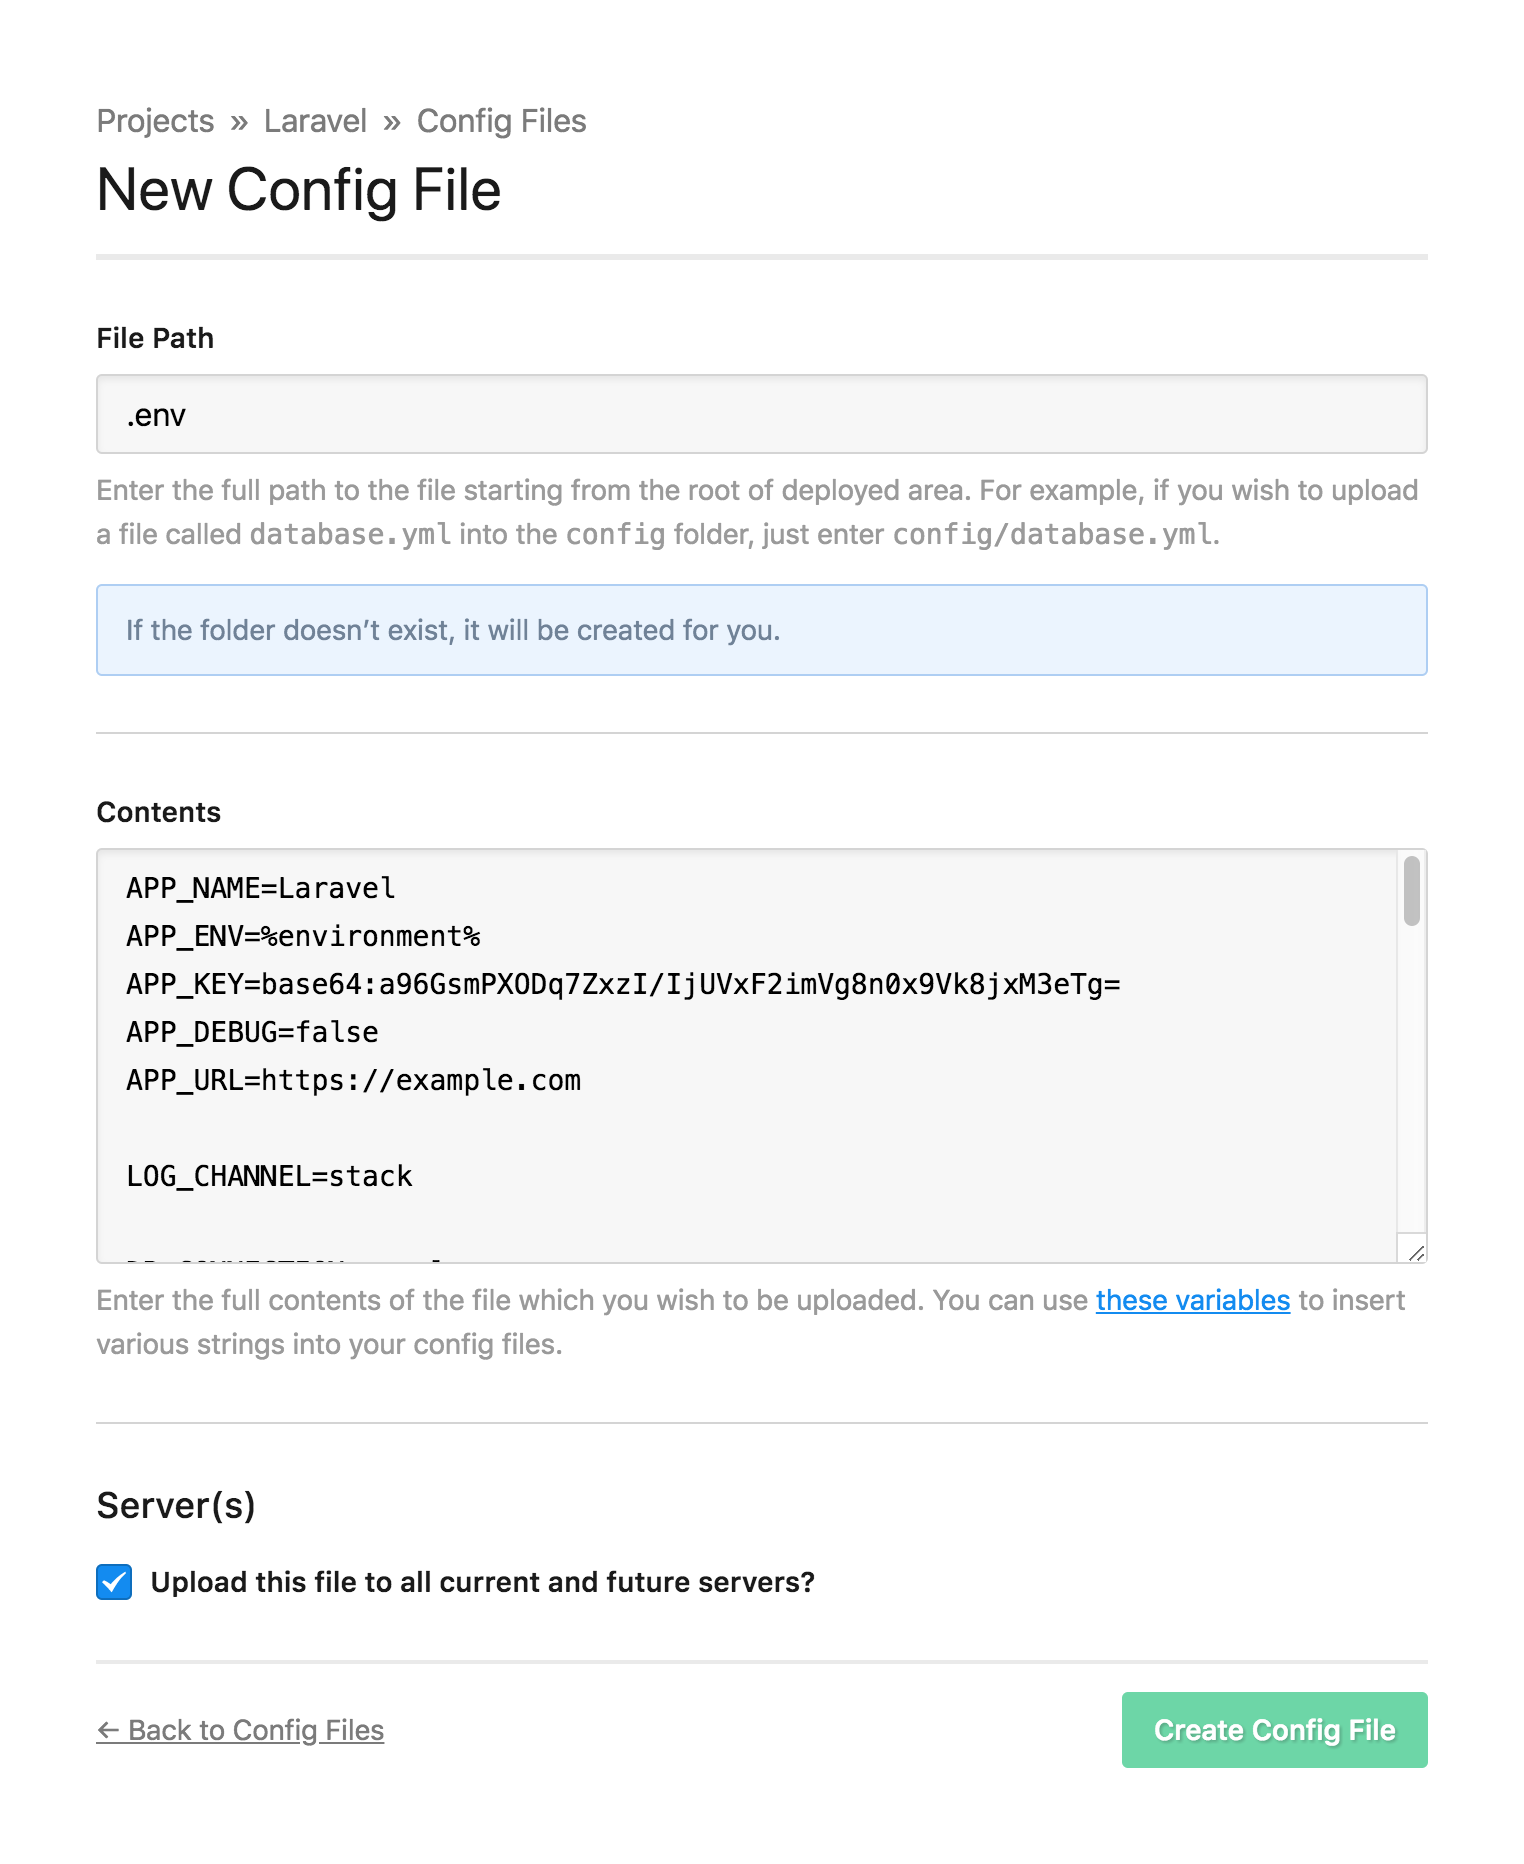
Add a config file
Config files in DeployHQ are files that you want to upload during a deployment, but not keep in your repository. This is particularly useful for configuration files that might contain sensitive data such as a .env file.
Go to Config Files and click New Config File.
In your project, open up the .env.example file and paste the contents into the config file content field.
Setup SSH commands
We need to configure a handful of commands to be executed on the server after every deployment.
Head to SSH Commands and click New SSH Command.
Create the following commands:
- Install Dependencies -
cd %path% && composer install --optimize-autoloader - Run Migrations -
cd %path% && php artisan migrate --force - Cache Configuration -
cd %path% && php artisan config:cache - Cache Routes -
cd %path% && php artisan route:cache - Cache Views -
cd %path% && php artisan view:cache - Optimize -
cd %path% && php artisan optimize
The --force flag is simply used to bypass the confirmation prompt.
If your application uses queue workers, you should also add a Restart Queue Workers command — cd %path% && php artisan queue:restart — to ensure workers pick up any code changes after deployment.
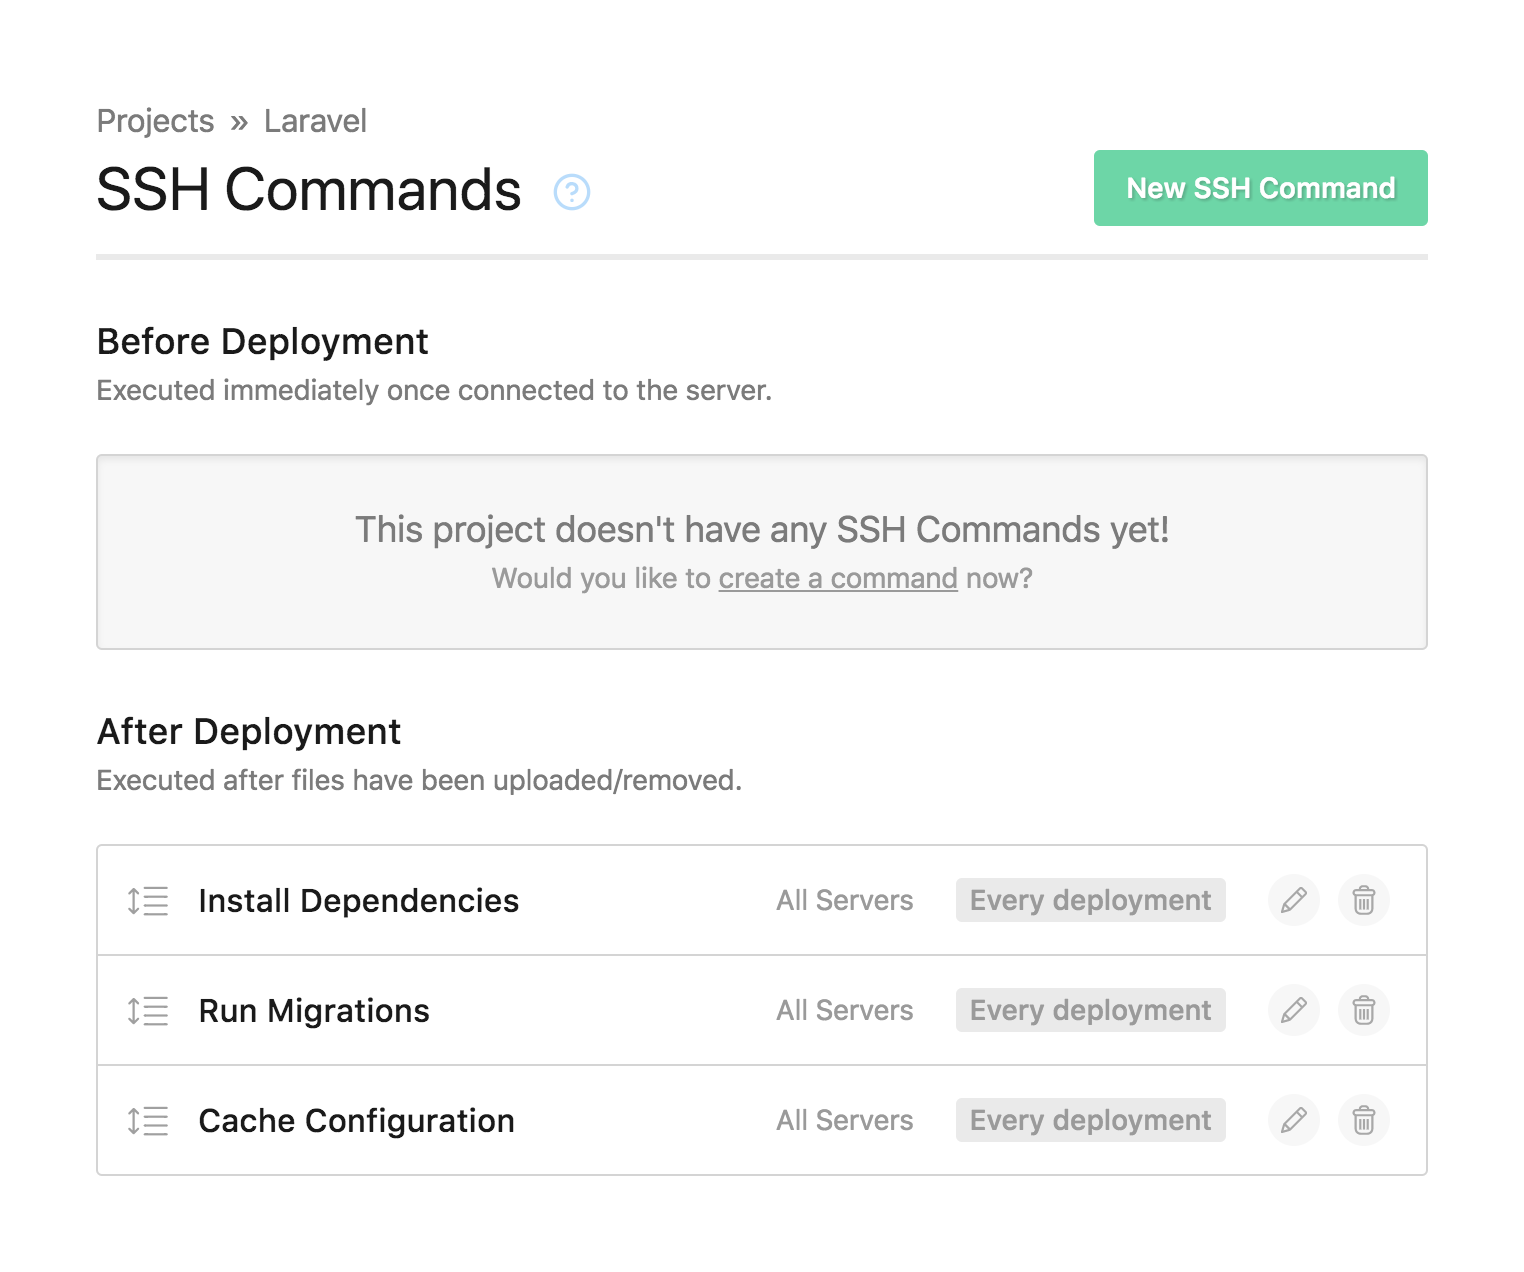
Commands are run from top to bottom, so make sure they're in the correct order.
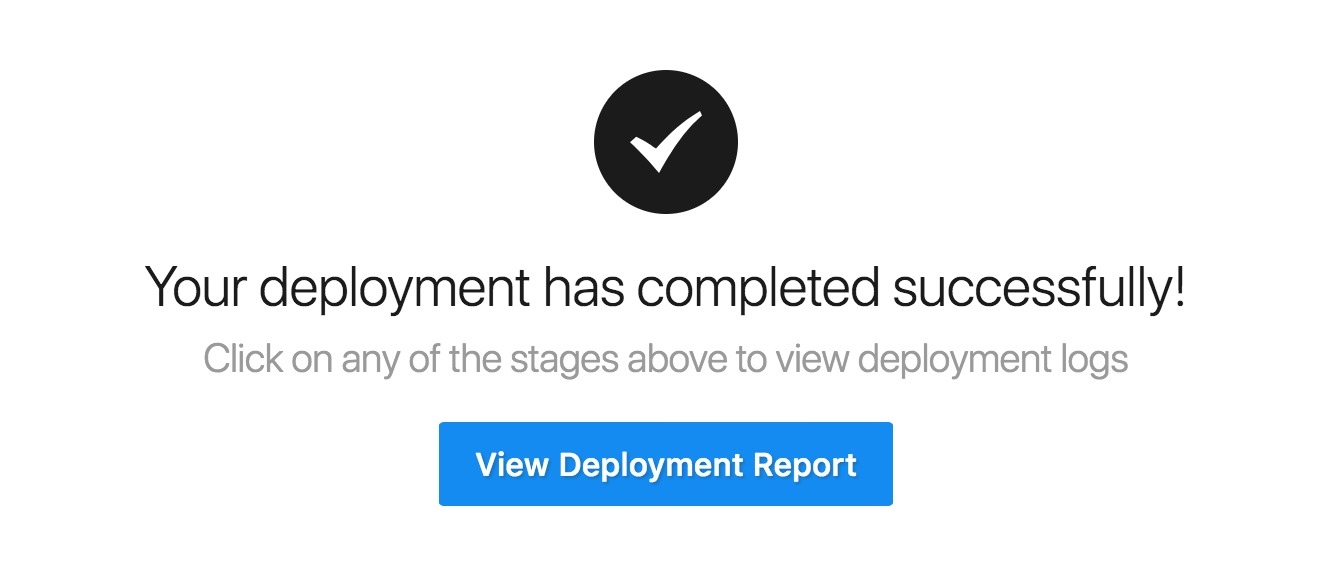
Deploy
That's all the configuration done — time to deploy!
Click Deploy Project in the header.
The server you created should be preselected, along with the start and end revisions. Once you're happy with everything, scroll down and click Deploy to begin the deployment.
Now sit back, relax and look very smug. You've just saved yourself bags of time.
If you've got any other projects you'd like to automate deployments for, we've written lots of guides for deploying the most popular application frameworks and content management systems.