Deploying to Amazon EC2 via DeployHQ: Automated AWS Deployment
Deploying to your site hosted with Amazon EC2 is very simple with DeployHQ.
Firstly, you'll need to set up your DeployHQ project, then connect to your EC2 server.
If you're looking to deploy to an S3 bucket, you can follow our documentation here.
Setting up your project
Head to the Projects screen in DeployHQ, then click the New Project button to get started.
You'll be prompted to enter a name for your project, then select where your repository is hosted.
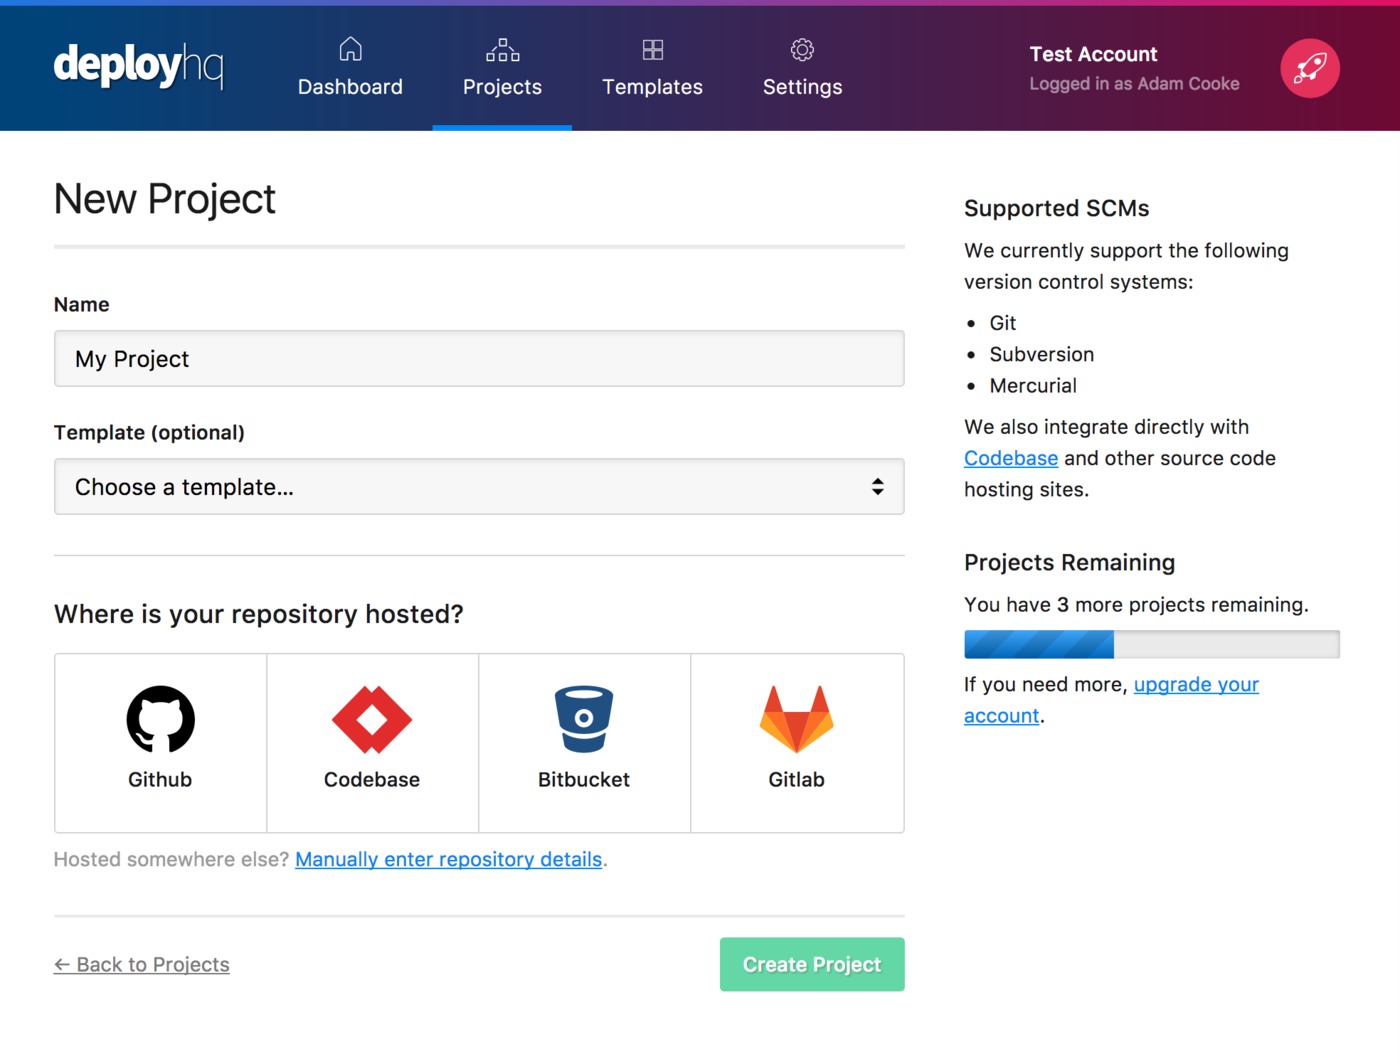
Next, click Create project and you'll be taken to a screen where you can log in with your repository hosting account to authorise access and then choose your repository.
- Adding a Bitbucket repository
- Adding a Codebase repository
- Adding a GitHub repository
- Adding a GitLab repository
- Adding a repository manually
Setting up EC2
In order to connect to your EC2 server, you'll need to enter your connection details and upload your DeployHQ project's public key to your EC2 console.
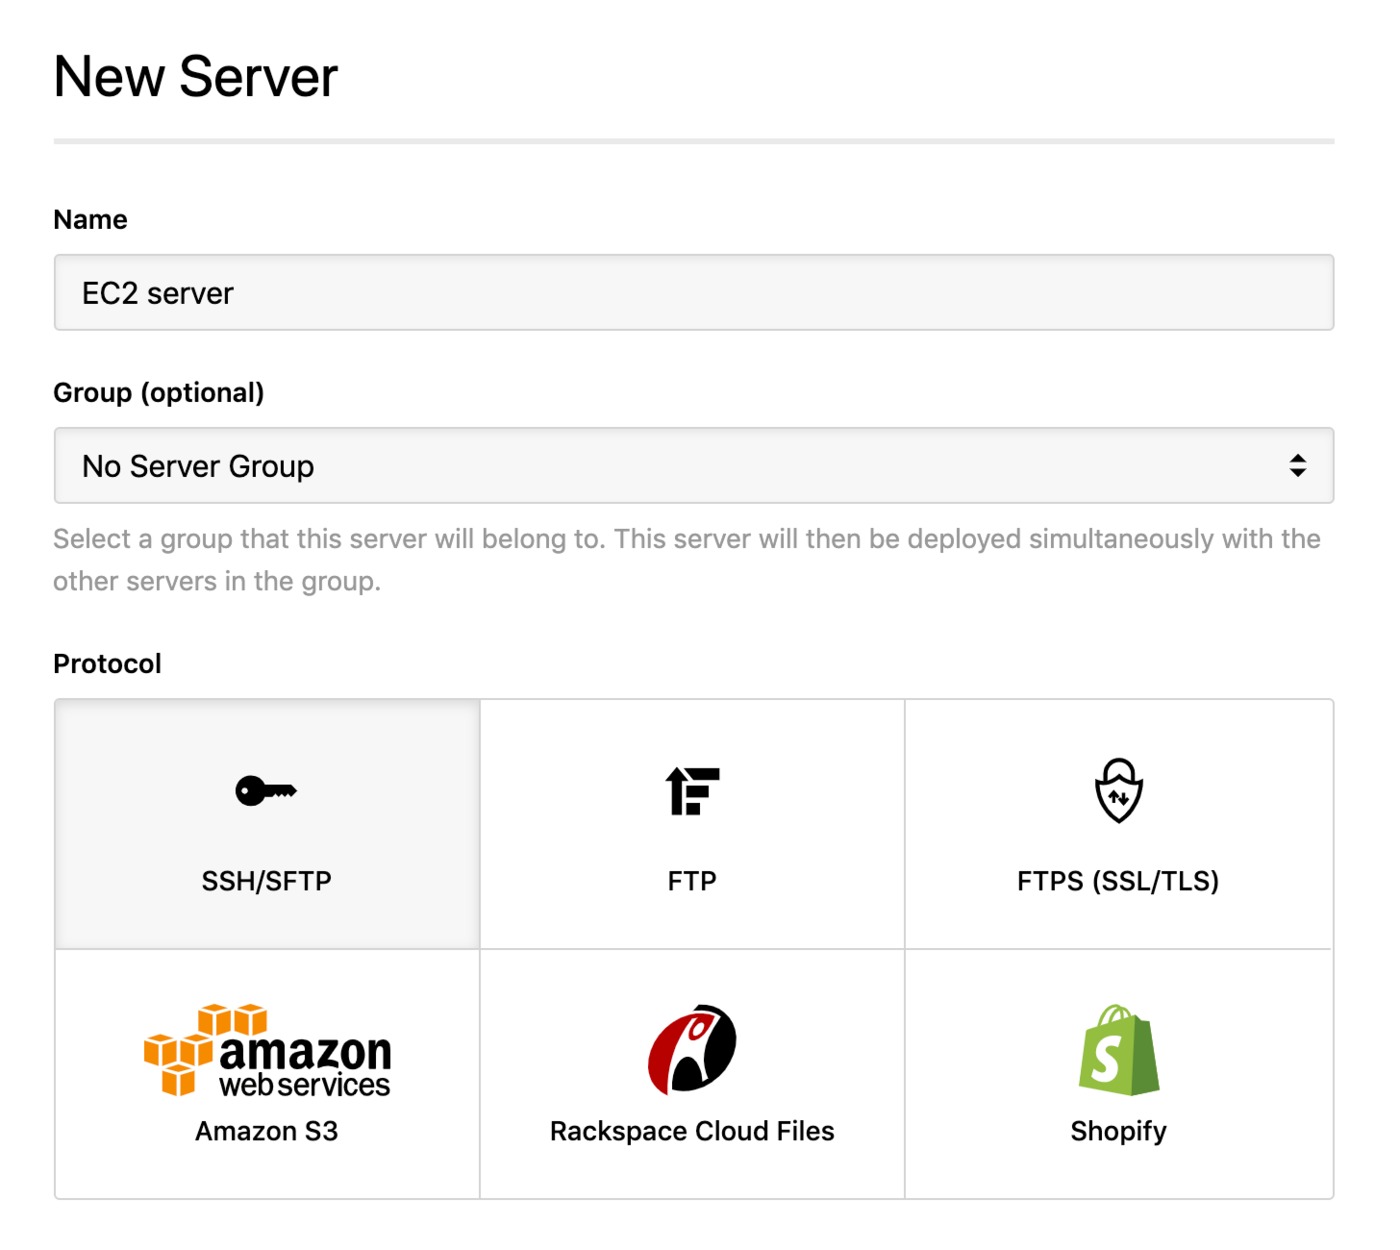
Head to Servers & Groups, and click the New Server button at the top of the screen. If you've just added your repository, you will have been taken to this page automatically.
Start by entering a name, and choosing SSH/SFTP as the protocol:
Next, enter the hostname of your server, leave the port blank to use 22 by default, enter ec2-user as your username, then finally, enable the option to use SSH key for authentication.
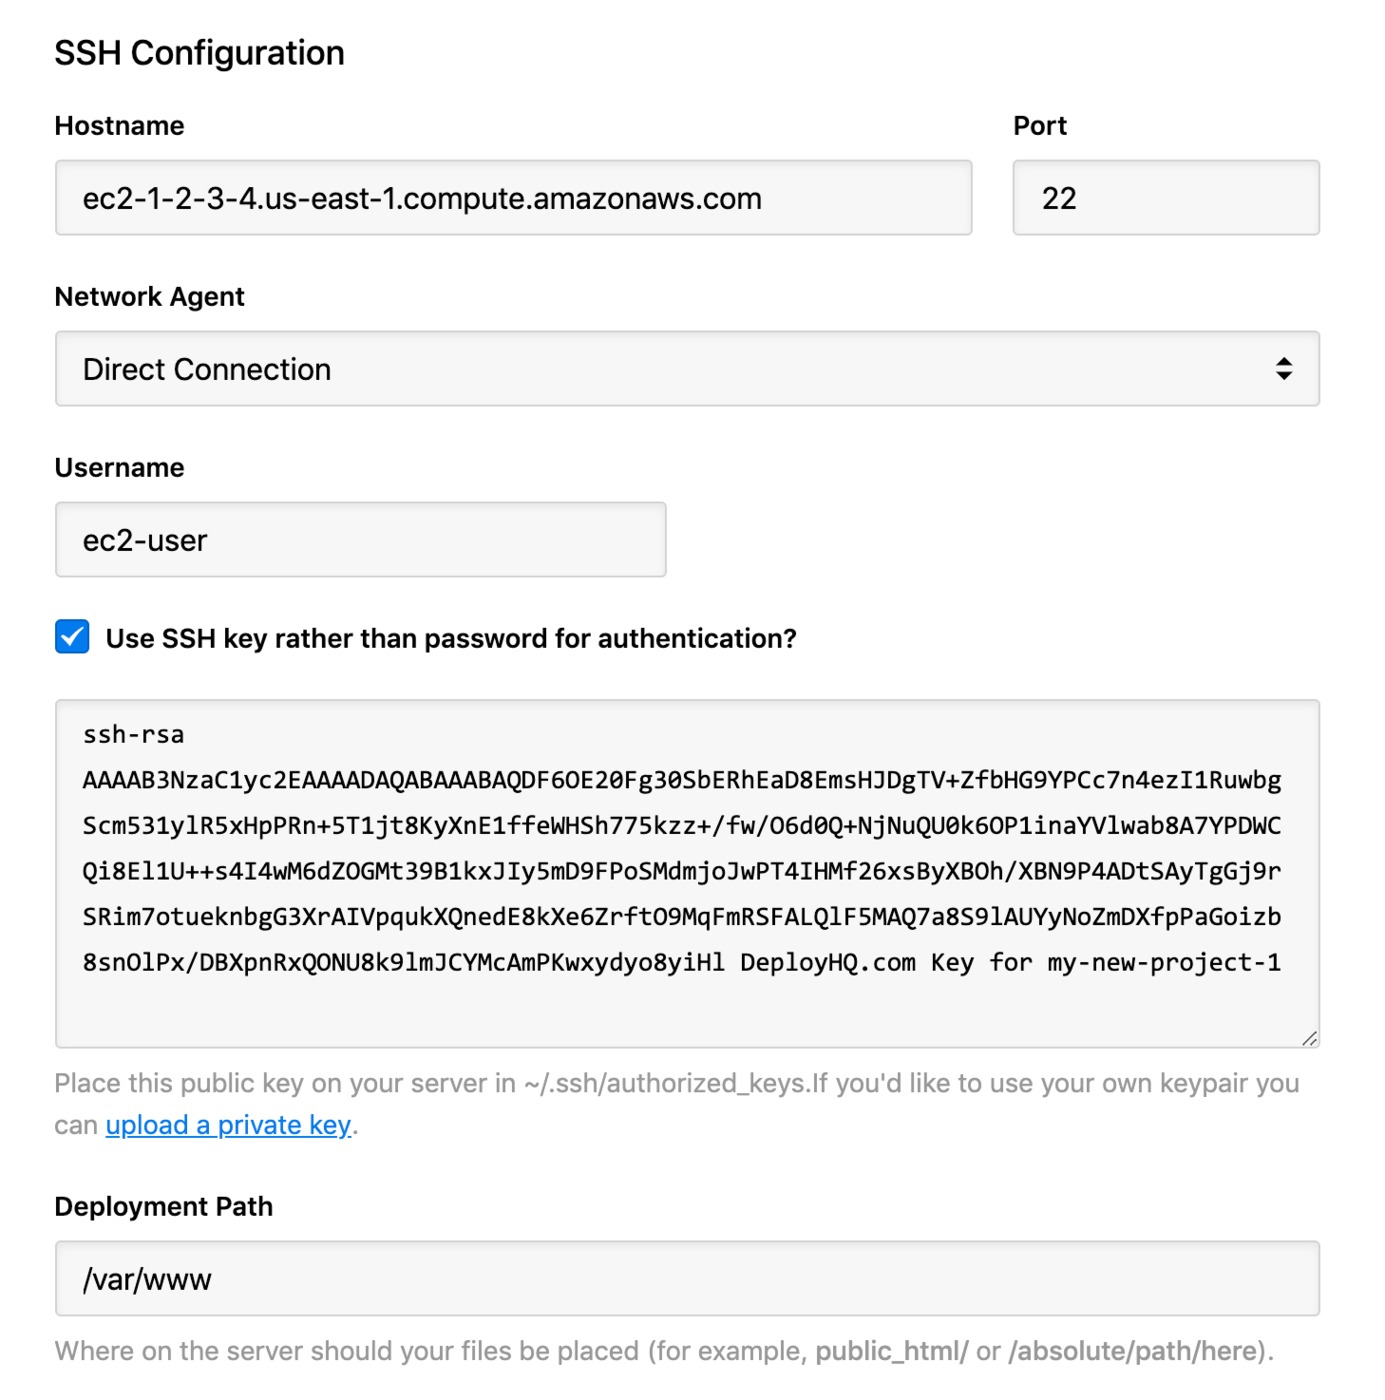
Copy the public key that's now displayed to your clipboard, then login to your EC2 server from your local terminal and add the key to your user's authorized_keys file.
$ ssh ec2-user@ec2-1-2-3-4.us-east-1.compute.amazonaws.com
$ nano ~/.ssh/authorized_keys
## Paste the key on a new line, and hit ctrl+x followed by
## y and enter on your keyboard
$ exit
Back in DeployHQ, you can now enter a deployment path - the directory to place files on your server.
Finally, within Deployment options, you can choose to automatically deploy your server and, if you're only deploying files from a certain directory in your repository, enter a Deployment subdirectory.
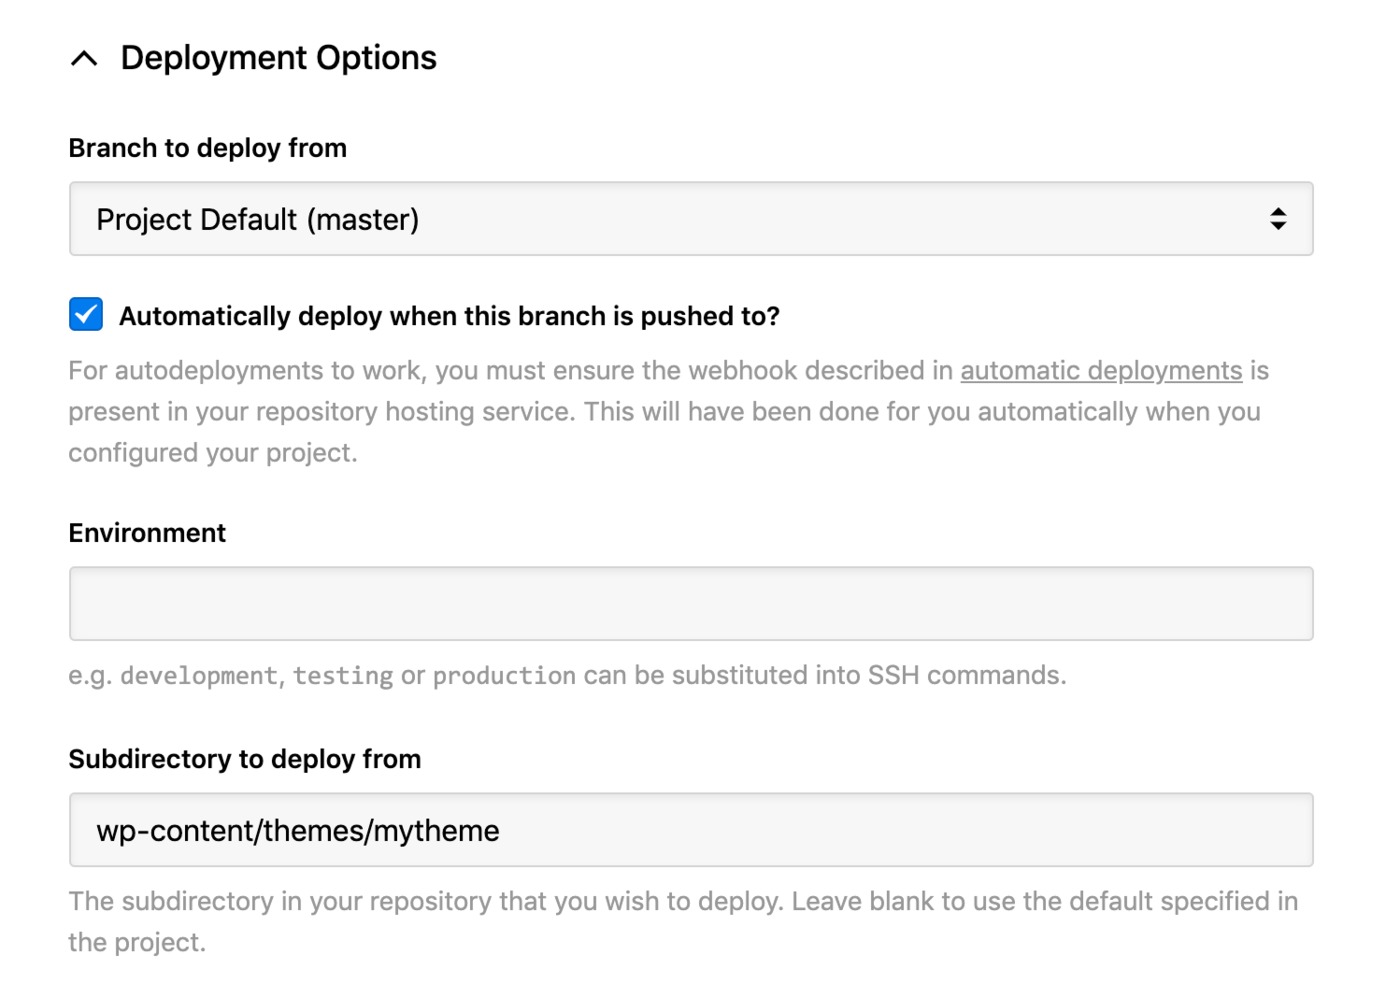
You might, for example, be deploying a Wordpress site, but only want to upload your theme folder.
When you're finished, just click Create Server and you can proceed to run your first deployment.
Run your first deployment
By default, DeployHQ will upload the whole repository to your server on the first deployment, because there is no previously deployed commit to compare to.
If your files are already on EC2 though and up to date with the latest commit, you can follow this guide to skip that first deployment:
Otherwise, just follow this guide to start your first deployment, then after the first deployment, only files that have changed will be uploaded in future.
That's it! You've now set up and run your first deployment to your EC2 server and your future changes will be uploaded for you automatically, or at the simple click of a button.
Further reading
DeployHQ has a number of very useful features to help with your deployments in general that you might wish to find out more about:
- Compiling assets and javascript with the Build pipeline
- Running commands on your server with SSH commands
- Stop certain files from being uploaded in deployments using Excluded files
- Keep important files safely away from your repository using Config files
- Keep your team in the loop and run other useful tasks during a deployment with our Integrations