Configuring a Shopify theme
Start by choosing Shopify as the protocol. The server form is organized into sections:
Store Details
Enter the store URL (e.g. deployhq-test.myshopify.com).

Authentication
Enter your API Access token. To generate an API access token for your Shopify store, please see our guide.

Theme
You can use the name of an existing theme, or simply enter a new one and it will be created for you when you first deploy to it.

Once you've configured these sections, your server will be ready for its first deployment.
Deploying to Shopify
When running a deployment to Shopify, only files that match the Theme structure will be uploaded, otherwise any other files outside will be skipped.
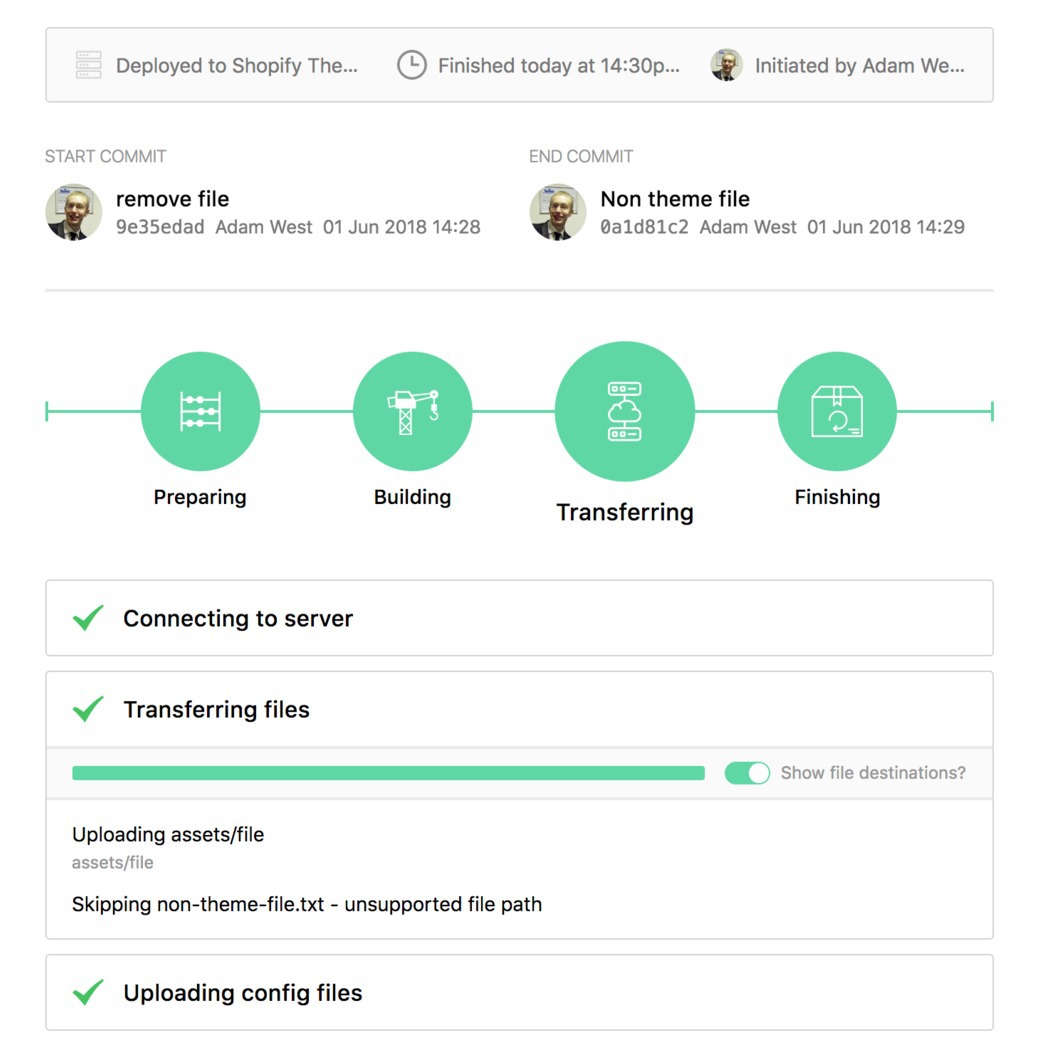
Once the deployment has run, you'll see the files within your Theme.

Additionally, deployments work in exactly the same way as other services and protocols, so you can easily set up automatic deployments to a Shopify theme when you push code to your repository.
Please note that existing Shopify connections created before 01/01/2024 should continue to work, but following Shopify removing our app from the store, we cannot provide a guarantee that this will be the case indefinitely. If you need to regenerate a manual API token, please follow our guide to do so.
As of 1st January 2026, Shopify retired the legacy "Develop apps" flow in the store admin. New custom apps must now be created via the Shopify Dev Dashboard — our guide covers both the new flow and how to retrieve a token from an existing legacy app.
The password generated by Shopify's Theme Access app is a separate credential used by Shopify CLI and Theme Kit, and cannot be used as a DeployHQ API Access Token — you'll need a token from a custom app.