How to add your Azure DevOps Repository to DeployHQ
If you wish to add your Azure DevOps repository to DeployHQ, you'll need to add it manually. Let's do this step by step.
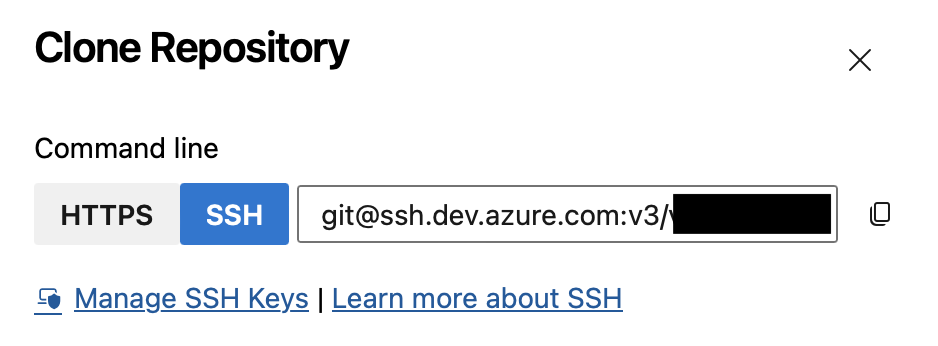
First, go to your Azure DevOps repository page, and look for the Clone button. Once there, make sure to select the SSH option, and copy the clone URL generated for you.

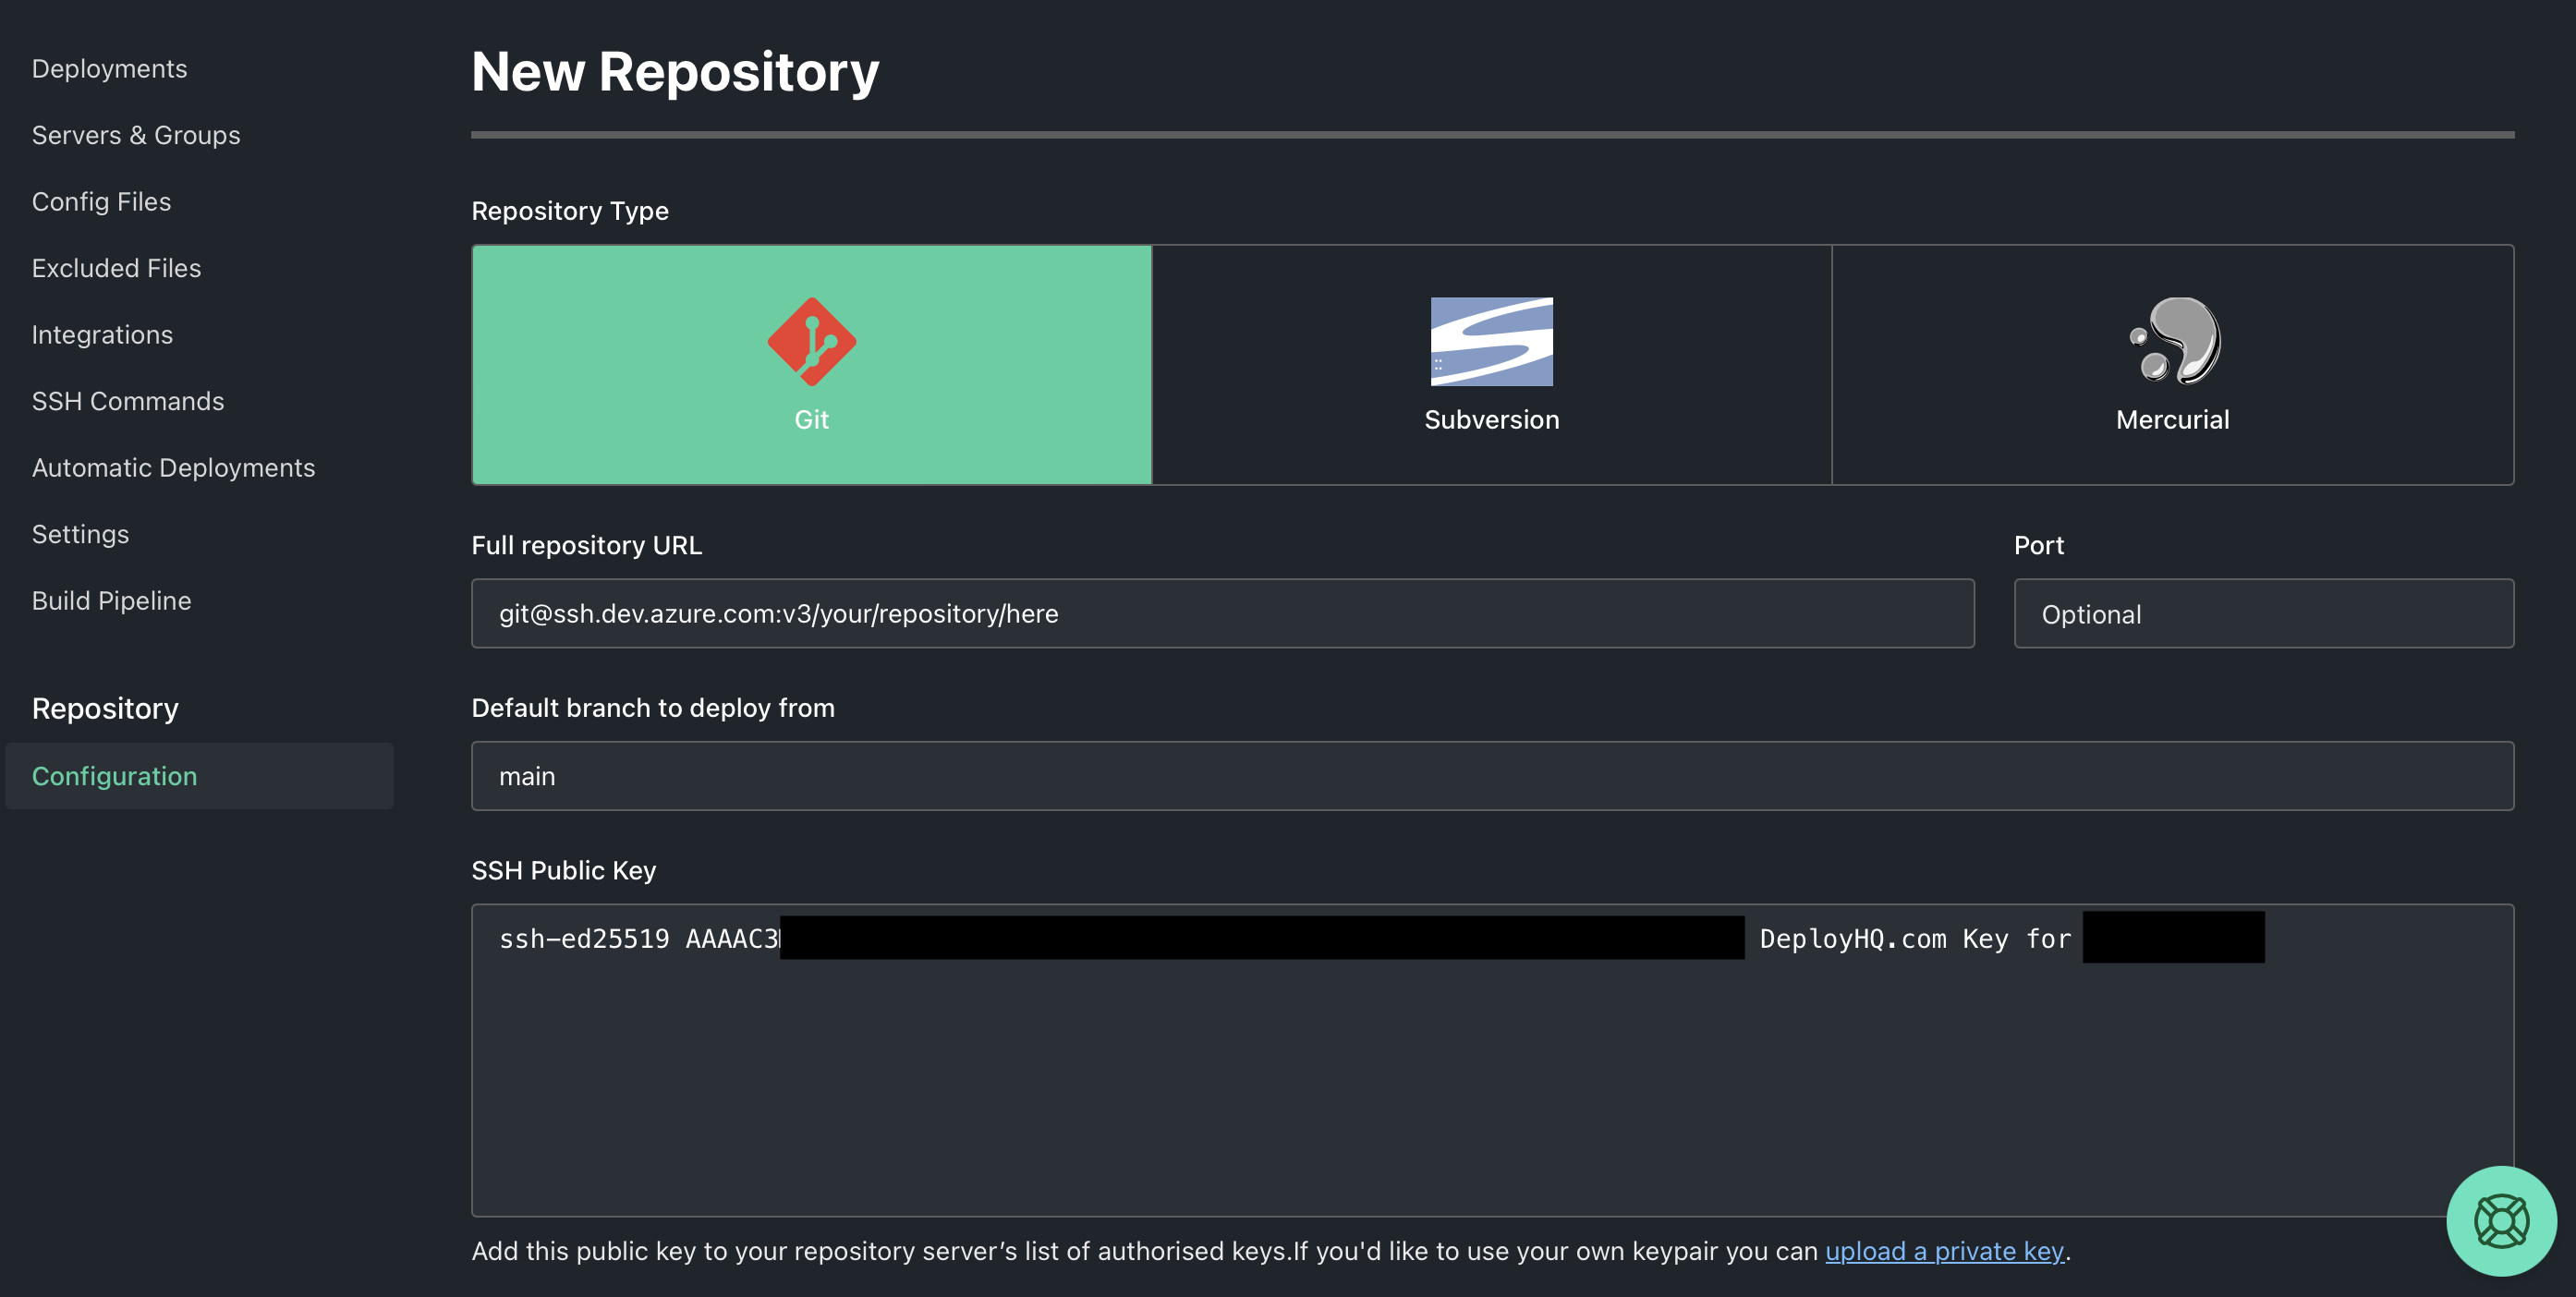
From here, you can add the repository URL and the branch from which you'd like to pull your commits in the DeployHQ repository fields, as shown below.

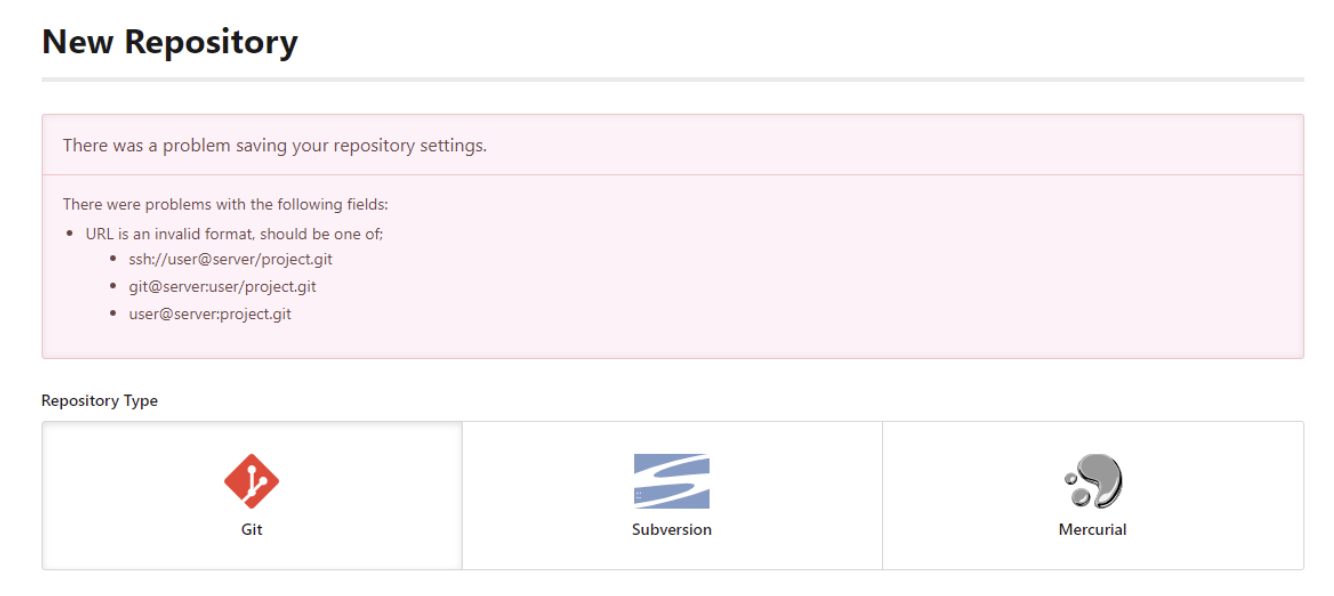
It's important to note that DeployHQ only accepts URLs with the ., - and _ characters, and other characters (spaces included) may cause the URL to not be accepted by our system, and return a URL is an invalid format error message.

Once done, check if the SSH key generated starts with ssh-ed25519 or ssh-rsa. As currently, Azure DevOps only accepts RSA keys, we need to make sure that the keys used in this step are RSA. If the key generated in this step is already an RSA key, then good news! You only need to copy this SSH key, and add it to your Azure DevOps account, as described here.
On the other hand, if the key generated is not an RSA key, don't worry, the process only adds a couple of extra steps. First, you'll need to generate a new key pair of RSA keys and upload the private key to your DeployHQ account. This step and more details can be found in this handy guide. Keep in mind that, during this "Add your repository manually" step, you can add this private key directly in the same page by clicking the upload your private key link, located below the SSH key box.

Once the private key is added to your DeployHQ account, you need to upload the public counterpart of your freshly generated key to your Azure DevOps account, as explained above.
Once done, you can leave the Hosting Service as Auto detect, and click on Create Repository.
And you're done! Your Azure DevOps repository is now connected to your DeployHQ project, and you can set up your configuration for your servers, automatic deployments, etc.